Difference between revisions of "Calypso Gateway"
m |
|||
| (81 intermediate revisions by the same user not shown) | |||
| Line 1: | Line 1: | ||
{{Template:Info Box Header}} | |||
{{:Entropia Universe Guide/Contents}} | |||
{ | __TOC__ | ||
{{LatestForumThreads | |||
|Feed=<rss max=3>http://www.entropiaplanets.com/forums/tutorials-guides-and-help.22/index.rss</rss> | |Feed=<rss max=3>http://www.entropiaplanets.com/forums/tutorials-guides-and-help.22/index.rss</rss> | ||
|Forum_URL=http://www.entropiaplanets.com/forums/tutorials-guides-and-help.22/ | |Forum_URL=http://www.entropiaplanets.com/forums/tutorials-guides-and-help.22/ | ||
|Forum_Name=Tutorials, Guides and Help}} | |Forum_Name=Tutorials, Guides and Help}} | ||
{{Template:Info Box Footer}} | |||
<div> | |||
'''Planet Calypso | <big>'''[[Planet Calypso beginners flow]]:'''</big> | ||
---- | <div class="wikiFocusBox" style="width:200px; display:inline-block; margin-right:10px; margin-bottom:10px; text-align:center;"><h3 class="wikiFocusHeader"><big>[[Genesis (Planet Calypso)|Genesis]]</big></h3> | ||
[[File:Calypso_Genesis_thumb_200x144.jpg|center|link=Genesis (Planet Calypso)]]</div><span class="fa fa-angle-right fa-5x"></span> | |||
<div class="wikiFocusBox" style="width:200px; display:inline-block; margin-right:10px; margin-bottom:10px; text-align:center;"><h3 class="wikiFocusHeader"><big>[[Calypso Gateway]]</big></h3> | |||
[[File:Calypso_Gateway_thumb_200x144.jpg|center|link=Calypso Gateway]]</div><span class="fa fa-angle-right fa-5x"></span> | |||
<div class="wikiFocusBox" style="width:200px; display:inline-block; margin-right:10px; margin-bottom:10px; text-align:center;"><h3 class="wikiFocusHeader"><big>[[Camp Icarus]]</big></h3> | |||
[[File:Camp_Icarus_thumb_200x144.jpg|center|link=Camp Icarus]]</div><span class="fa fa-angle-right fa-5x"></span> | |||
<div class="wikiFocusBox" style="width:200px; display:inline-block; margin-right:10px; margin-bottom:10px; text-align:center;"><h3 class="wikiFocusHeader"><big>[[Half Moon Bay]]</big></h3> | |||
[[File:Crystalline_Cavern_thumb_200x144.jpg|center|link=Half Moon Bay]]</div><span class="fa fa-angle-right fa-5x"></span> | |||
<div class="wikiFocusBox" style="width:200px; display:inline-block; margin-right:10px; margin-bottom:10px; text-align:center;"><h3 class="wikiFocusHeader"><big>[[Port Atlantis]]</big></h3> | |||
[[File:Port_Atlantis_thumb_200x144.jpg|center|link=Port Atlantis]]</div> | |||
</div>[[Monria]] Beginner's Flow: [[Genesis (Planet Calypso)|Genesis]] > [[Crystalline Cavern]] > [[Calypso Gateway]] > [[Monria Hub]] | |||
Calypso Gateway is the beginners tutorial area | ==Calypso Gateway== | ||
Calypso Gateway is the beginners main tutorial area for new players of [[Planet Calypso]], [[ROCKtropia]] and [[Monria]]. The area is accessed by leaving [[Crystalline Cavern]]. From Calypso Gateway Planet Calypso and ROCKtropia players proceed to [[Camp Icarus]], Monria players proceed to [[Monria Hub]]. | |||
General | General notes: | ||
1. The images in this guide will probably not show the visuals you experience because these are depending on graphics setting and time of arrival (there's time of day lighting) | |||
2. The guide is following the experience of a Planet Calypso player, there might be minor differences for ROCKtropia and Monria players. | |||
3. MindArk is constantly reviewing the area and applying minor improvements | |||
==How to get to Calypso Gateway== | ==How to get to Calypso Gateway== | ||
You can enter Calypso Gateway by leaving the [[Crystalline Cavern]]. You are not supposed to go back to the Crystalline Cavern, so you might want to make sure you have finished the Target Practise mission there. | You can enter Calypso Gateway by leaving the [[Crystalline Cavern]]. You are not supposed to go back to the Crystalline Cavern, so you might want to make sure you have finished the Target Practise mission there. | ||
Old player wanting to go through the gateway mission chain? Start there: [[Crystalline_Cavern#Crystalline_Cavern_for_old_players|Crystalline Cavern for old players]] | |||
==Arrival at Calypso Gateway== | ==Arrival at Calypso Gateway== | ||
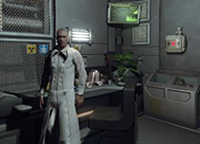
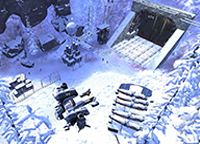
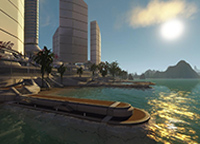
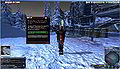
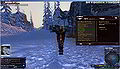
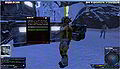
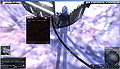
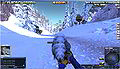
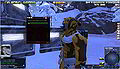
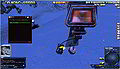
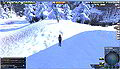
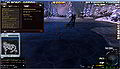
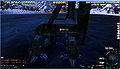
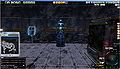
You arrive at Calypso Gateway approximately at [[Position]] (66680, 71404, 878). You can check your position by pressing {{keypress|P}}. When arriving at Calypso Gateway you should have a mission called "Find Mr Yoshida", check the mission section further below. | You arrive at Calypso Gateway approximately at [[Position]] (66680, 71404, 878). You can check your position by pressing {{keypress|P}}. When arriving at Calypso Gateway you should have a mission called "Find Mr Yoshida", check the mission section further below. | ||
<gallery> | <gallery> | ||
File:Calypso Gateway Thule Arrival 01. | File:Calypso Gateway Thule Arrival 01.jpg|Arriving at Calypso Gateway | ||
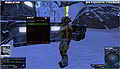
File:Calypso Gateway Thule Arrival 02. | File:Calypso Gateway Thule Arrival 02.jpg|Arrival from above | ||
</gallery> | </gallery> | ||
==Calypso Gateway Missions | ==Calypso Gateway Missions Walkthrough== | ||
On Calypso Gateway you can go through a set of story-driven tutorial missions which give you a first overview of the game's features and functionality as well as award you a number of items and skills. It is '''highly recommended''' to do these missions but there is also | On Calypso Gateway you can go through a set of story-driven tutorial missions which give you a first overview of the game's features and functionality as well as award you a number of items and skills. It is '''highly recommended''' to do these missions but there is also the option to bypass the tutorial which is not recommended, not at last because you are not supposed to get back to Calypso Gateway. | ||
'''These are the 18 missions:''' | |||
# [[Calypso_Gateway#Find_Mr_Yoshida|Find Mr Yoshida]] | |||
# [[Calypso_Gateway#Report_To_Jimmy|Report To Jimmy]] | |||
# [[Calypso_Gateway#Limited_Connectivity|Limited Connectivity]] | |||
# [[Calypso_Gateway#Pest_Eradication|Pest Eradication]] | |||
# [[Calypso_Gateway#Power_Struggle|Power Struggle]] | |||
# [[Calypso_Gateway#A_Message_From_Yoshida|A Message From Yoshida]] | |||
# [[Calypso_Gateway#Unfinished_Business|Unfinished Business]] | |||
# [[Calypso_Gateway#Analyzing_The_Sample|Analyzing The Sample]] | |||
# [[Calypso_Gateway#Fuel_My_Fire|Fuel My Fire]] | |||
# [[Calypso_Gateway#Another_Message_From_Yoshida|Another Message From Yoshida]] | |||
# [[Calypso_Gateway#Prospective_Prospector|Prospective Prospector]] | |||
# [[Calypso_Gateway#Rifles,_Assemble|Rifles, Assemble]] | |||
# [[Calypso_Gateway#Shooting_Star|Shooting Star]] | |||
# [[Calypso_Gateway#Inspect-A-Gadget|Inspect-A-Gadget]] | |||
# [[Calypso_Gateway#That_Others_May_Live|That Others May Live]] | |||
# [[Calypso_Gateway#The_Grand_Finale|The Grand Finale]] | |||
# [[Calypso_Gateway#Hangar_Hangout|Hangar Hangout]] | |||
# [[Calypso_Gateway#A_New_Beginning|A New Beginning]] | |||
'''Read also:''' | |||
* [[Calypso_Gateway#What_after_Calypso_Gateway|What after Calypso Gateway?]] | |||
===Find Mr Yoshida=== | ===Find Mr Yoshida=== | ||
Mission page: [[Mission:Find Mr Yoshida]] | |||
"Find Mr Yoshida" is the first mission after your arrival on Calypso Gateway and it's a very simple one. You just need to walk a few steps from your point of a arrival towards Mr Yoshida and the mission is done. | |||
<gallery> | <gallery> | ||
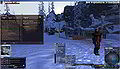
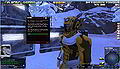
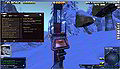
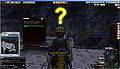
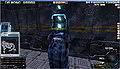
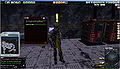
Image:Calypso Gateway Find Mr Yoshida 01. | Image:Calypso Gateway Find Mr Yoshida 01.jpg|Mr Yoshida is located just a few straight steps from the arrival. | ||
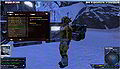
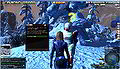
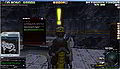
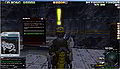
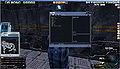
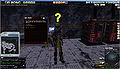
Image:Calypso Gateway Thule Mr Yoshida. | Image:Calypso Gateway Thule Mr Yoshida.jpg|Mr Yoshida is easy to spot by the yellow exclamation mark above his head symbolizing relevancy for progress in a mission. | ||
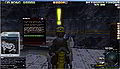
Image:Calypso Gateway Find Mr Yoshida 02. | Image:Calypso Gateway Find Mr Yoshida 02.jpg|As soon as you approach Mr Yoshida the mission gets completed and you are offered the next mission "Report To Jimmy". | ||
</gallery> | </gallery> | ||
<small>[[Calypso_Gateway#Calypso_Gateway_Missions_Walkthrough|Back up to missions list]]</small> | |||
===Report To Jimmy=== | ===Report To Jimmy=== | ||
Mission page: [[Mission:Report To Jimmy]] | |||
<gallery> | <gallery> | ||
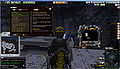
Image:Calypso Gateway Thule Report to Jimmy start 01. | Image:Calypso Gateway Thule Report to Jimmy start 01.jpg|'''It is not recommended''' to skip the whole tutorial described on this page and proceed to [[Camp Icarus]], but at this point you have the option. | ||
Image:Calypso Gateway Thule Report to Jimmy start 02. | Image:Calypso Gateway Thule Report to Jimmy start 02.jpg|Dialogue | ||
Image:Calypso Gateway Thule Report to Jimmy start 03. | Image:Calypso Gateway Thule Report to Jimmy start 03.jpg|Dialogue | ||
Image:Calypso Gateway Thule Report to Jimmy start 04. | Image:Calypso Gateway Thule Report to Jimmy start 04.jpg|Dialogue | ||
Image:Calypso Gateway Thule Report to Jimmy Report to Jimmy 01. | Image:Calypso Gateway Thule Report to Jimmy Report to Jimmy 01.jpg|The mission in the [[Quest/Mission Log]] | ||
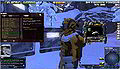
Image:Calypso Gateway Thule Report to Jimmy Report to Jimmy 02. | Image:Calypso Gateway Thule Report to Jimmy Report to Jimmy 02.jpg|Jimmy is just about ~40m away. He should have a target marker indicating the distance. Also his position appears as a waypoint on the [[Viewport,_dashboard_and_desktop_icons#Radar_panel|Radar]] and the Map (press {{keypress|M}} to open/close the map). | ||
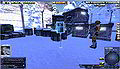
Image:Calypso Gateway Thule Report to Jimmy Report to Jimmy 03. | Image:Calypso Gateway Thule Report to Jimmy Report to Jimmy 03.jpg|Jimmy at (66732, 71382, 876)<br />(to display your own postion in the chat window press {{keypress|P}}) | ||
Image:Calypso Gateway Thule Report to Jimmy Report to Jimmy completed. | Image:Calypso Gateway Thule Report to Jimmy Report to Jimmy completed.jpg|As soon as you approach him the mission gets completed and a dialogue pops up | ||
</gallery> | </gallery> | ||
<small>[[Calypso_Gateway#Calypso_Gateway_Missions_Walkthrough|Back up to missions list]]</small> | |||
===Limited Connectivity=== | ===Limited Connectivity=== | ||
Mission page: [[Mission:Limited Connectivity]] | |||
<gallery> | <gallery> | ||
Image:Calypso Gateway Thule Limited connectivity start 01. | Image:Calypso Gateway Thule Limited connectivity start 01.jpg|Jimmy at (66732, 71382, 876), as soon as you approach a dialogue should pop up | ||
Image:Calypso Gateway Thule Limited connectivity start 02. | Image:Calypso Gateway Thule Limited connectivity start 02.jpg|Dialogue (click through) | ||
Image:Calypso Gateway Thule Limited Connectivity Find The Connection Issue 01. | Image:Calypso Gateway Thule Limited Connectivity Find The Connection Issue 01.jpg|You finally receive the quest which consists of finding a connection issue | ||
Image:Calypso Gateway Thule Limited Connectivity Find The Connection Issue 02. | Image:Calypso Gateway Thule Limited Connectivity Find The Connection Issue 02.jpg|The connection issue is just about 50m to the northwest, follow the waypoint marker on the radar and/or the distance marker on screen | ||
Image:Calypso Gateway Thule Limited Connectivity Find The Connection Issue 03. | Image:Calypso Gateway Thule Limited Connectivity Find The Connection Issue 03.jpg|As soon as you approach the location of the connection issue a dialogue pops up and the quest proceeds | ||
Image:Calypso Gateway Thule Limited Connectivity Find The Connection Issue Report Back To Jimmy. | Image:Calypso Gateway Thule Limited Connectivity Find The Connection Issue Report Back To Jimmy.jpg|The next tasks is to report back to Jimmey | ||
Image:Calypso Gateway Thule Limited Connectivity Report Back To Jimmy 02. | Image:Calypso Gateway Thule Limited Connectivity Report Back To Jimmy 02.jpg|And Jimmy should be located just about 50m to the south-east, follow the waypoint marker on the radar and/or the distance marker on screen | ||
Image:Calypso Gateway Thule Limited Connectivity Report Back To Jimmy 03. | Image:Calypso Gateway Thule Limited Connectivity Report Back To Jimmy 03.jpg|As soon as you approach Jimmy a dialogue pops up, clicking through it completes the quest will finally lead to the next: "Pest Eradication" | ||
Image:Calypso Gateway Thule Limited Connectivity Report Back To Jimmy 04. | Image:Calypso Gateway Thule Limited Connectivity Report Back To Jimmy 04.jpg|Dialogue (click through) | ||
Image:Calypso Gateway Thule Limited Connectivity Report Back To Jimmy 05. | Image:Calypso Gateway Thule Limited Connectivity Report Back To Jimmy 05.jpg|Intro to the next quest "Pest Eradication" | ||
Image:Calypso Gateway Thule Limited Connectivity Report Back To Jimmy 06. | Image:Calypso Gateway Thule Limited Connectivity Report Back To Jimmy 06.jpg|"Limited Connectivity" completed / "Pest Eradication" assigned | ||
</gallery> | </gallery> | ||
<small>[[Calypso_Gateway#Calypso_Gateway_Missions_Walkthrough|Back up to missions list]]</small> | |||
===Pest Eradication=== | ===Pest Eradication=== | ||
Mission page: [[Mission:Pest Eradication]] | |||
The introductionary dialogue to this mission is to be found at the end of the preceding mission "Limited Connectivity". | The introductionary dialogue to this mission is to be found at the end of the preceding mission "Limited Connectivity". | ||
<gallery> | <gallery> | ||
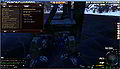
Image:Calypso Gateway Thule Pest Eradication Pygmy Chompers Killed.png | Image:Calypso Gateway Thule Pest Eradication Pygmy Chompers Killed.jpg|The mission is started as soon as completing the preceding "Limited Connectivity", NPC Jimmy at (66732, 71382, 876). The objective is to kill 3 [[Creature:Chomper|Pygmy Chompers]] | ||
Image:Calypso Gateway Thule Pest Eradication Pygmy Chompers Killed 02. | Image:No-image-available-120x120.png|To kill creatures you need to equip a weapon:<br />1. Press {{keypress|I}} on your keyboard to open the inventory.<br />2. Click the "Weapons" category (4th from above in the right menu bar of the Inventory window)<br />3. Right-click the weapon and left-click "Equip" in the dropdown menu | ||
Image:Calypso Gateway Thule Pest Eradication Pygmy Chompers Killed 03. | Image:Calypso Gateway Thule Pest Eradication Pygmy Chompers Killed 02.jpg|Pygmy Chompers can be found ~100m down the path leading westwards | ||
Image:Calypso Gateway Thule Pest Eradication Pygmy Chompers Killed 04. | Image:Calypso Gateway Thule Pest Eradication Pygmy Chompers Killed 03.jpg|For killing creatures you can switch between two modes by pressing {{Keypress|space}}:<br />- "Aim mode": aim at creature the with [[Viewport,_dashboard_and_desktop_icons#Crosshairs|crosshairs]], click left mouse-button to shoot<br />- "Cursor mode": press left mouse button on a creature and drag the health bar, left-click the health bar to shoot | ||
Image:Calypso Gateway Thule Pest Eradication Pygmy Chompers Killed 05. | Image:Calypso Gateway Thule Pest Eradication Pygmy Chompers Killed 04.jpg|To loot a dead creature in "Aim mode" double-click the carcass or in "Cursor mode", right-click the health bar and choose "Loot" from the dropdown menu, you either get a "no loot" message in the [[Viewport,_dashboard_and_desktop_icons#Chat_panel|chat]] or a loot window | ||
Image:Calypso Gateway Thule Pest Eradication Pygmy Chompers Killed Return To Jimmy. | Image:Calypso Gateway Thule Pest Eradication Pygmy Chompers Killed 05.jpg|The progress in the mission is tracked in the Quest/Mission Log, for example "Pygmy Chompers killed '''(2/3)'''" | ||
Image:Calypso Gateway Thule Pest Eradication Return To Jimmy 02. | Image:Calypso Gateway Thule Pest Eradication Pygmy Chompers Killed Return To Jimmy.jpg|As soon as you have killed 3 Pygmy Chompers the objective gets completed the the next activated, which is "Return to Jimmy" | ||
Image:Calypso Gateway Thule Pest Eradication Return To Jimmy 03. | Image:Calypso Gateway Thule Pest Eradication Return To Jimmy 02.jpg|Jimmy is still located at the exit of [[Genesis Alpha Station]], just as at the start of the mission | ||
Image:Calypso Gateway Thule Pest Eradication Power Struggle. | Image:Calypso Gateway Thule Pest Eradication Return To Jimmy 03.jpg|As soon as you approach Jimmy a dialogue pops up, click "Yes." | ||
Image:Calypso Gateway Thule Pest Eradication Power Struggle.jpg|The mission gets completed and the dialogue continues with the next mission "Power Struggle" | |||
</gallery> | </gallery> | ||
<small>[[Calypso_Gateway#Calypso_Gateway_Missions_Walkthrough|Back up to missions list]]</small> | |||
===Power Struggle=== | ===Power Struggle=== | ||
Mission page: [[Mission:Power Struggle]] | |||
<gallery> | <gallery> | ||
Image:Calypso Gateway Thule Pest Eradication Power Struggle. | Image:Calypso Gateway Thule Pest Eradication Power Struggle.jpg|The dialogue is started as soon as completing the preceding mission "Pest Eradication", NPC Jimmy at (66732, 71382, 876). | ||
Image:Calypso Gateway Thule Power Struggle Locate The Unpowered Turret 01. | Image:Calypso Gateway Thule Power Struggle Locate The Unpowered Turret 01.jpg|The objective is to locate an unpowered turret and replace the battery. To avoid you need to walk all the way you are given a car and fuel. | ||
Image:Calypso Gateway Thule Help Terminal. | Image:Calypso Gateway Thule Help Terminal.jpg|For further info regarding vehicles you can consult the Help Terminal or just the following images and instructions in this section. | ||
Image:Calypso Gateway Thule Help Terminal Menu. | Image:Calypso Gateway Thule Help Terminal Menu.jpg|Help Terminal Menu | ||
Image:Calypso Gateway Thule Power StruggleVehicle 01. | Image:Calypso Gateway Thule Power StruggleVehicle 01.jpg|'''Vehicle How-to'''<br />The vehicle can be found in the inventory {{Keypress|i}}) under the "Miscellaneous" tab. | ||
Image:Calypso Gateway Thule Power Struggle Vehicle 02. | Image:Calypso Gateway Thule Power Struggle Vehicle 02.jpg|'''Vehicle How-to'''<br />Right-click it and choose "Spawn vehicle" from the dropdown. | ||
Image:Calypso Gateway Thule Power Struggle Vehicle 03. | Image:Calypso Gateway Thule Power Struggle Vehicle 03.jpg|'''Vehicle How-to'''<br />The mouse pointer is replaced with the vehicle, move it to an appropriate place on the ground, if neccessary rotate it by pressing the right mouse button, spawn it by clicking the left mouse button. | ||
Image:Calypso Gateway Thule Power Struggle Vehicle 04. | Image:Calypso Gateway Thule Power Struggle Vehicle 04.jpg|'''Vehicle How-to'''<br />The fuel ([[Item:Oil|Oil]]) can be found in the inventory {{Keypress|i}}) under the "Mined Resources" tab. | ||
Image:Calypso Gateway Thule Power Struggle Vehicle 05. | Image:Calypso Gateway Thule Power Struggle Vehicle 05.jpg|'''Vehicle How-to'''<br />To add fuel drag'n'drop the Oil icon from the inventory onto the spawned vehicle. | ||
Image:Calypso Gateway Thule Power Struggle Vehicle 06. | Image:Calypso Gateway Thule Power Struggle Vehicle 06.jpg|'''Vehicle How-to'''<br />Confirm by clicking the "Ok" button: [[File:Ok.png]] | ||
Image:Calypso Gateway Thule Power Struggle Vehicle 07. | Image:Calypso Gateway Thule Power Struggle Vehicle 07.jpg|'''Vehicle How-to'''<br />To enter the vehicle right-click it and choose "Operate" from the dropdown, alternatively simply double click it. | ||
Image:Calypso Gateway Thule Power StruggleVehicle 08. | Image:Calypso Gateway Thule Power StruggleVehicle 08.jpg|'''Vehicle How-to'''<br />Cars can be easily steered using {{Keypress|W}} {{Keypress|A}} {{Keypress|S}} {{Keypress|D}} - to exit the vehicle right-click anywhere and choose "Exit Seat" from the dropdown. | ||
Image:Calypso Gateway Thule Power Struggle Vehicle 09. | Image:Calypso Gateway Thule Power Struggle Vehicle 09.jpg|'''Vehicle How-to'''<br />To put the vehicle back into inventory right-click the spawned vehicle and choose "Pick up" from the dropdown. | ||
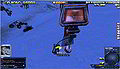
Image:Calypso Gateway Thule Power Struggle Locate The Unpowered Turret 02. | Image:Calypso Gateway Thule Power Struggle Locate The Unpowered Turret 02.jpg|The unpowered turret can be found at (66843, 71384, 863) | ||
Image:Calypso Gateway Thule Power Struggle Replace The Battery. | Image:Calypso Gateway Thule Power Struggle Replace The Battery.jpg|As soon as you approach the turret the mission is updated with a new objective ("Replace The Battery"). | ||
Image:Calypso Gateway Thule Power Struggle Replace The Battery 02. | Image:Calypso Gateway Thule Power Struggle Replace The Battery 02.jpg|The battery can be found on the ground right at the turret, right-click it and choose "Operate" from the dropdown. | ||
Image:Calypso Gateway Thule Power Struggle Replace The Battery | Image:Calypso Gateway Thule Power Struggle Replace The Battery 03.jpg|Click through the dialogue | ||
Image:Calypso Gateway Thule Power Struggle A Message From Yoshida. | Image:Calypso Gateway Thule Power Struggle A Message From Yoshida.jpg|The mission gets completed (rewarded with [[Skill:Electonics|Electonics skills]]) and the dialogue for the next mission "A Message From Yoshida" starts | ||
</gallery> | </gallery> | ||
<small>[[Calypso_Gateway#Calypso_Gateway_Missions_Walktrough|Back up to missions list]]</small> | |||
===A Message From Yoshida=== | ===A Message From Yoshida=== | ||
Mission page: [[Mission:A Message From Yoshida]] | |||
<gallery> | <gallery> | ||
Image:Calypso Gateway Thule Power Struggle A Message From Yoshida. | Image:Calypso Gateway Thule Power Struggle A Message From Yoshida.jpg|The dialogue is started as soon as completing the preceding mission "Power Struggle", click through the dialogue | ||
Image:Calypso Gateway Thule A Message From Yoshida 02. | Image:Calypso Gateway Thule A Message From Yoshida 02.jpg|Click through the dialogue | ||
Image:Calypso Gateway Thule A Message From Yoshida Report To Paul Reinhardt 01. | Image:Calypso Gateway Thule A Message From Yoshida Report To Paul Reinhardt 01.jpg|The objective is to "Report To Paul Reinhardt" | ||
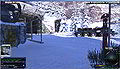
Image:Calypso Gateway Thule A Message From Yoshida Report To Paul Reinhardt 02. | Image:Calypso Gateway Thule A Message From Yoshida Report To Paul Reinhardt 02.jpg|Paul Reinhardt is to be found further down the road at ~(67352, 71406, 769) | ||
Image:Calypso_Gateway_Thule_A_Message_From_Yoshida_Report_Unfinished_Business.jpg|As soon as you approach Paul the mission gets completed (reward: [[Item:Vivo Explorer (L)|Vivo Explorer (L)]]) and the dialogue for the next mission "Unfinished Business" starts | |||
</gallery> | </gallery> | ||
<small>[[Calypso_Gateway#Calypso_Gateway_Missions_Walkthrough|Back up to missions list]]</small> | |||
===Unfinished Business=== | ===Unfinished Business=== | ||
Mission page: [[Mission:Unfinished Business]] | |||
<gallery> | <gallery> | ||
Image:Calypso Gateway Thule A Message From Yoshida Report Unfinished Business. | Image:Calypso Gateway Thule A Message From Yoshida Report Unfinished Business.jpg|The dialogue is started as soon as completing the preceding mission "A Message From Yoshida", the objective is to collect ice-core samples at Lake Phrys, click through the dialogue | ||
Image:Calypso Gateway Thule Unfinished Business 01. | Image:Calypso Gateway Thule Unfinished Business 01.jpg|Click through the dialogue | ||
Image:Calypso Gateway Thule Unfinished Business Locate The Drill Rig 01. | Image:Calypso Gateway Thule Unfinished Business Locate The Drill Rig 01.jpg|Objective: Locate the Drill Rig | ||
Image:Calypso Gateway Thule Unfinished Business Locate The Drill Rig 02. | Image:Calypso Gateway Thule Unfinished Business Locate The Drill Rig 02.jpg|The drill rig can be found at Lake Phrys at [[Position]] ~(67500, 71145, 733) | ||
Image:Calypso Gateway Thule Unfinished Business Gather The Sample 01. | Image:Calypso Gateway Thule Unfinished Business Gather The Sample 01.jpg|Next objective: "Gather the sample", operate the Drill Rig to do so | ||
Image:Calypso Gateway Thule Unfinished Return To Paul Reinhardt 01. | Image:Calypso Gateway Thule Unfinished Return To Paul Reinhardt 01.jpg|Next objective: "Return to Paul Reinhardt" | ||
Image:Calypso Gateway Thule Unfinished Return To Paul Reinhardt 02. | Image:Calypso Gateway Thule Unfinished Return To Paul Reinhardt 02.jpg|Paul Reinhardt is still to be found at ~(67352, 71406, 769), click through the dialogue | ||
Image:Calypso Gateway Thule Unfinished Business To Camp Asmundsen. | Image:Calypso Gateway Thule Unfinished Business To Camp Asmundsen.jpg|The mission gets completed (reward: [[Skill:First Aid Skill]]) and the dialogue for the next mission "To Camp Amundsen" starts | ||
</gallery> | </gallery> | ||
<small>[[Calypso_Gateway#Calypso_Gateway_Missions_Walkthrough|Back up to missions list]]</small> | |||
===To Camp Amundsen=== | ===To Camp Amundsen=== | ||
Mission page: [[Mission:To Camp Amundsen]] | |||
<gallery> | <gallery> | ||
Image:Calypso Gateway Thule Unfinished Business To Camp Asmundsen. | Image:Calypso Gateway Thule Unfinished Business To Camp Asmundsen.jpg|The dialogue starts as soon as completing the preceding mission "Unfinished Business", click through the dialogue | ||
Image:Calypso Gateway Thule To Camp Asmundsen 02. | Image:Calypso Gateway Thule To Camp Asmundsen 02.jpg|The objective is to deliver the sample to Camp Amundsen | ||
Image:Calypso Gateway Thule To Camp Amundsen 03. | Image:Calypso Gateway Thule To Camp Amundsen 03.jpg|Camp Amundsen is located further down the road | ||
Image:Calypso Gateway Thule To Camp Amundsen 04. | Image:Calypso Gateway Thule To Camp Amundsen 04.jpg|The recipient of the sample is to be found at [[Position]] ~(68035, 71272, 683) | ||
Image:Calypso Gateway Thule To Camp Amundsen 05. | Image:Calypso Gateway Thule To Camp Amundsen 05.jpg|Click through the dialogue | ||
Image:Calypso Gateway Thule To Camp Amundsen Analyzing The Sample. | Image:Calypso Gateway Thule To Camp Amundsen Analyzing The Sample.jpg|The mission gets completed (reward: {{IconLink|Athletics}}) and the dialogue for the next mission "Analyzing the sample" starts | ||
</gallery> | </gallery> | ||
<small>[[Calypso_Gateway#Calypso_Gateway_Missions_Walkthrough|Back up to missions list]]</small> | |||
===Analyzing The Sample=== | ===Analyzing The Sample=== | ||
Mission page: [[Mission:Analyzing The Sample]] | |||
<gallery> | <gallery> | ||
Image:Calypso Gateway Thule To Camp Amundsen Analyzing The Sample. | Image:Calypso Gateway Thule To Camp Amundsen Analyzing The Sample.jpg|The dialogue starts as soon as completing the preceding mission "To Camp Amundsen", click through the dialogue | ||
Image:Calypso Gateway Thule Analyzing The Sample 02. | Image:Calypso Gateway Thule Analyzing The Sample 02.jpg|Click through the dialogue | ||
Image:Calypso Gateway Thule Analyzing The Sample 03. | Image:Calypso Gateway Thule Analyzing The Sample 03.jpg|Choose whether or not to read the short intro to the Entropia Universe economy, in case you choose not to read it in game you can still read it on the following 5 images | ||
Image:Calypso Gateway Thule Analyzing The Sample Trade Terminal 01. | Image:Calypso Gateway Thule Analyzing The Sample Trade Terminal 01.jpg|'''Economy Intro 1'''<br />How to use the [[Trade Terminal|Trade Terminal (TT)]] | ||
Image:Calypso Gateway Thule Analyzing The Sample Trade Terminal 02. | Image:Calypso Gateway Thule Analyzing The Sample Trade Terminal 02.jpg|'''Economy Intro 2'''<br />How to buy things from the Trade Terminal | ||
Image:Calypso Gateway Thule Analyzing The Sample Trade Terminal 03. | Image:Calypso Gateway Thule Analyzing The Sample Trade Terminal 03.jpg|'''Economy Intro 3'''<br />What are [[PED]]? | ||
Image:Calypso Gateway Thule Analyzing The Sample Trade Terminal 04. | Image:Calypso Gateway Thule Analyzing The Sample Trade Terminal 04.jpg|'''Economy Intro 4'''<br />How do you get PED? (see also: [[Depositing money into EU|Depositing money into Entropia Universe]] and [[Making money in EU|About Making Money in Entropia Universe]] | ||
Image:Calypso Gateway Thule Analyzing The Sample Trade Terminal 05. | Image:Calypso Gateway Thule Analyzing The Sample Trade Terminal 05.jpg|Click through the dialogue | ||
Image:Calypso Gateway Thule Analyzing The Sample Purchase 100 Syntethic Mind Essence 01. | Image:Calypso Gateway Thule Analyzing The Sample Purchase 100 Syntethic Mind Essence 01.jpg|You receive 2 Hides and the actual mission starts, objective: Purchase 100 [[Item:Synthetic Mind Essence|Synthetic Mind Essence]] | ||
Image:Calypso Gateway Thule Analyzing The Sample Purchase 100 Syntethic Mind Essence 02. | Image:Calypso Gateway Thule Analyzing The Sample Purchase 100 Syntethic Mind Essence 02.jpg|The next Trade Terminal is located at [[Position]] ~(68019, 71201, 683) | ||
Image:Calypso Gateway Thule Analyzing The Sample Purchase 100 Syntethic Mind Essence 03. | Image:Calypso Gateway Thule Analyzing The Sample Purchase 100 Syntethic Mind Essence 03.jpg|Operate the Trade Terminal (right-click and choose operate from the drop-down OR double-click the Trade Terminal | ||
Image:Calypso Gateway Thule Analyzing The Sample Purchase 100 Syntethic Mind Essence 04. | Image:Calypso Gateway Thule Analyzing The Sample Purchase 100 Syntethic Mind Essence 04.jpg|'''Selling the Hides'''<br />Click the "Sell" tab ("Buy" tab is chosen by default) | ||
Image:Calypso Gateway Thule Analyzing The Sample Purchase 100 Syntethic Mind Essence 05. | Image:Calypso Gateway Thule Analyzing The Sample Purchase 100 Syntethic Mind Essence 05.jpg|'''Selling the Hides'''<br />Inventory open automatically, choose the "Materials" tab (6th from above), drag'n'drop the Hides from the Invetory onto the Trade Terminal | ||
Image:Calypso Gateway Thule Analyzing The Sample Purchase 100 Syntethic Mind Essence 06. | Image:Calypso Gateway Thule Analyzing The Sample Purchase 100 Syntethic Mind Essence 06.jpg|'''Selling the Hides'''<br />Click the "SELL" button at the bottom of the Trade Terminal (TT) window | ||
Image:Calypso Gateway Thule Analyzing The Sample Purchase 100 Syntethic Mind Essence 07.png | Image:Calypso Gateway Thule Analyzing The Sample Purchase 100 Syntethic Mind Essence 07.jpg|'''Selling the Hides'''<br />Confirm the trade by clicking the "Ok" button [[File:Ok.png]]. | ||
Image:Calypso Gateway Thule Analyzing The Sample Purchase 100 Syntethic Mind Essence 08. | Image:Calypso Gateway Thule Analyzing The Sample Purchase 100 Syntethic Mind Essence 08.jpg|'''Buying the Synthtic Mind Essence (SME)'''<br />Click the the "BUY" tab in the TT | ||
Image:Calypso Gateway Thule Analyzing The Sample Purchase 100 Syntethic Mind Essence 09. | Image:Calypso Gateway Thule Analyzing The Sample Purchase 100 Syntethic Mind Essence 09.jpg|'''Buying the SME'''<br />Open the "Ammunition" category, choose "Synthetic Mind Essence", set "Quantity" to 100 with the tiny arrow buttons, and click the "BUY" button | ||
Image:Calypso Gateway Thule Analyzing The Sample Purchase 100 Syntethic Mind Essence 10.png | Image:Calypso Gateway Thule Analyzing The Sample Purchase 100 Syntethic Mind Essence 10.jpg|'''Buying the SME'''<br />Confirm the trade by clicking the "Ok" button [[File:Ok.png]]. | ||
Image:Calypso Gateway Thule Analyzing The Sample | Image:Calypso Gateway Thule Analyzing The Sample Bring The Essence to Lauren Lord.jpg|The objective (Purchase 100 SME) gets completed and the next "Bring The Essence" to Lauren Lord" is starts | ||
Image:Calypso Gateway Thule Analyzing The Sample Bring The Essence to Lauren Lord 02.jpg|Lauren Lord can be found at [[Position]] ~(78034 71280, 683), a soon as you approach her a dialogue starts, click through the dialogue | |||
Image:Calypso Gateway Thule Analyzing The Sample Bring The Essence to Lauren Lord 02. | Image:Calypso Gateway Thule Analyzing The Sample Bring The Essence to Lauren Lord 03.jpg|A quest items window and the Inventory open automatically, in the Inventory window select the "Mindforce" tab | ||
Image:Calypso Gateway Thule Analyzing The Sample Bring The Essence to Lauren Lord 03. | Image:Calypso Gateway Thule Analyzing The Sample Bring The Essence to Lauren Lord 04.jpg|Drag and drop the SME icon from the Inventory into the quest items window and confirm with the "Accept" button [[File:Ok.png]] | ||
Image:Calypso Gateway Thule Analyzing The Sample Bring The Essence to Lauren Lord 04.png | Image:Calypso Gateway Thule Analyzing The Sample Bring The Essence to Lauren Lord 05.jpg|Click through the dialogue, the mission gets completed and the next mission "Fuel My Fire" can be started at Lauren Lord immediately | ||
Image:Calypso Gateway Thule Analyzing The Sample Bring The Essence to Lauren Lord 05. | |||
</gallery> | </gallery> | ||
<small>[[Calypso_Gateway#Calypso_Gateway_Missions_Walkthrough|Back up to missions list]]</small> | |||
===Fuel My Fire=== | ===Fuel My Fire=== | ||
Mission page: [[Mission:Fuel My Fire]] | |||
<gallery> | <gallery> | ||
Image:Calypso Gateway Thule Fuel My Fire 01. | Image:Calypso Gateway Thule Fuel My Fire 01.jpg|This mission is given by Lauren Lord at Position ~(78034 71280, 683) in Camp Amundsen, click through the dialogue | ||
Image:Calypso Gateway Thule Fuel My Fire 02. | Image:Calypso Gateway Thule Fuel My Fire 02.jpg|Click through the dialogue | ||
Image:Calypso Gateway Thule Fuel My Fire Locate The Oil Field. | Image:Calypso Gateway Thule Fuel My Fire Locate The Oil Field.jpg|First objective: Locate The Oil Field | ||
Image:Calypso Gateway Thule Fuel My Fire Locate The Oil Field 02. | Image:Calypso Gateway Thule Fuel My Fire Locate The Oil Field 02.jpg|The Oil Field is located at [[Position]] ~(67962, 71028, 722) | ||
Image:Calypso Gateway Thule Fuel My Fire Oil Barrels Extracted. | Image:Calypso Gateway Thule Fuel My Fire Oil Barrels Extracted.jpg|The Oil Field has 3 claim rods, operate (right-click -> "Operate" OR double-click) one after another to extract [[Item:Crude Oil|Crude Oil]] | ||
Image:Calypso Gateway Thule Fuel My Fire Oil Barrels Extracted 02. | Image:Calypso Gateway Thule Fuel My Fire Oil Barrels Extracted 02.jpg|The extracted oil will be shown in a [[Loot Window]], the progress in the mission objective is tracked in the [[Quest/Mission Log]]: "Oil Barrels Extracted: (X/10) | ||
Image:Calypso Gateway Thule Fuel My Fire Deliver The Oil to Lauren Lord 01. | Image:Calypso Gateway Thule Fuel My Fire Deliver The Oil to Lauren Lord 01.jpg|Once 10 barrels are extracted the next objective is to "Deliver The Oil To Lauren Lord" | ||
Image:Calypso Gateway Thule Fuel My Fire Deliver The Oil to Lauren Lord 02. | Image:Calypso Gateway Thule Fuel My Fire Deliver The Oil to Lauren Lord 02.jpg|Lauren is still located at Position ~(78034 71280, 683) in Camp Amundsen, click through the dialogue | ||
Image:Calypso Gateway Thule Fuel My Fire Deliver The Oil to Lauren Lord 03. | Image:Calypso Gateway Thule Fuel My Fire Deliver The Oil to Lauren Lord 03.jpg|A Quest Items window and Inventory open automatically, the Oil is to be found under the "Mined Resources" tab | ||
Image:Calypso Gateway Thule Fuel My Fire Deliver The Oil to Lauren Lord 04.png | Image:Calypso Gateway Thule Fuel My Fire Deliver The Oil to Lauren Lord 04.jpg|Drag'n'drop the Oil onto the Quest Items window and click the Accept button [[File:Ok.png]] | ||
Image:Calypso Gateway Thule Fuel My Fire Deliver The Oil to Lauren Lord Another Message From Yoshida. | Image:Calypso Gateway Thule Fuel My Fire Deliver The Oil to Lauren Lord Another Message From Yoshida.jpg|The mission gets completed and the dialogue of the next mission "Another Message From Yoshida" starts | ||
</gallery> | </gallery> | ||
<small>[[Calypso_Gateway#Calypso_Gateway_Missions_Walkthrough|Back up to missions list]]</small> | |||
===Another Message From Yoshida=== | ===Another Message From Yoshida=== | ||
Mission page: [[Mission:Another Message From Yoshida]] | |||
<gallery> | <gallery> | ||
Image:Calypso Gateway Thule Fuel My Fire Deliver The Oil to Lauren Lord Another Message From Yoshida. | Image:Calypso Gateway Thule Fuel My Fire Deliver The Oil to Lauren Lord Another Message From Yoshida.jpg|The dialogue starts as soon as completing the preceding mission "Fuel My Fire", click through the dialogue | ||
Image:Calypso Gateway Thule Another Message From Yoshida 02. | Image:Calypso Gateway Thule Another Message From Yoshida 02.jpg|Click through the dialogue | ||
Image:Calypso Gateway Thule Another Message From Yoshida 03 Locate The Supply Pod. | Image:Calypso Gateway Thule Another Message From Yoshida 03 Locate The Supply Pod.jpg|First objective: "Locate The Supply Pod" | ||
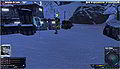
Image:Calypso Gateway Thule Another Message From Yoshida 04 Locate The Supply Pod. | Image:Calypso Gateway Thule Another Message From Yoshida 04 Locate The Supply Pod.jpg|The supply is located further down the road leaving Camp Amundsen at [[Position]] ~(68767, 71043, 657) | ||
Image:Calypso Gateway Thule Another Message From Yoshida 05 Retrieve The Mining Equipment. | Image:Calypso Gateway Thule Another Message From Yoshida 05 Retrieve The Mining Equipment.jpg|Retriev the mining equipment by operating each piece:<br />-[[Item:Genesis Star Rookie Finder (L)|Genesis Star Rookie Finder (L)]]<br />-[[Item:Genesis Star Rookie Extractor (L)|Genesis Star Rookie Extractor (L)]]<br />-Survey Probes | ||
Image:Calypso Gateway Thule Another Message From Yoshida Prospective Prospector. | Image:Calypso Gateway Thule Another Message From Yoshida Prospective Prospector.jpg|As soon as you have all equipment the mission gets completed (reward: {{IconLink|Geology}}) and the dialogue for the next mission "Prospective Prospector" starts | ||
</gallery> | </gallery> | ||
<small>[[Calypso_Gateway#Calypso_Gateway_Missions_Walkthrough|Back up to missions list]]</small> | |||
===Prospective Prospector=== | ===Prospective Prospector=== | ||
Mission page: [[Mission:Prospective Prospector]] | |||
<gallery> | <gallery> | ||
Image:Calypso Gateway Thule Another Message From Yoshida Prospective Prospector. | Image:Calypso Gateway Thule Another Message From Yoshida Prospective Prospector.jpg|The dialogue starts as soon as completing the preceding mission "Another Message From Yoshida", click through the dialogue | ||
Image:Calypso Gateway Thule Prospective Prospector 02 Survey The Area. | Image:Calypso Gateway Thule Prospective Prospector 02 Survey The Area.jpg|The Objective is to "Survey the Area For Potential Resources" | ||
Image:Calypso Gateway Thule Prospective Prospector 03 Help Terminal. | Image:Calypso Gateway Thule Prospective Prospector 03 Help Terminal.jpg|The [[Help Terminal]] right in front of the pod contains a brief Mining Tutorial, you can read it there or on the following 10 images, alternatively everything is explained again after the next 10 images (a detailed mining guide can be found there: [[Entropia_Universe_mining_guide|Mining guide]] | ||
Image:Calypso Gateway Thule Prospective Prospector 04 Survey Mining Tutorial. | Image:Calypso Gateway Thule Prospective Prospector 04 Survey Mining Tutorial.jpg|'''Mining Tutorial 1'''<br />Help Terminal Menu | ||
Image:Calypso Gateway Thule Prospective Prospector 05 Survey Mining Tutorial. | Image:Calypso Gateway Thule Prospective Prospector 05 Survey Mining Tutorial.jpg|'''Mining Tutorial 2'''<br />Quick overview or more detailed? | ||
Image:Calypso Gateway Thule Prospective Prospector 06 Survey Mining Tutorial. | Image:Calypso Gateway Thule Prospective Prospector 06 Survey Mining Tutorial.jpg|'''Mining Tutorial 3'''<br />Tutorial Table of Contens | ||
Image:Calypso Gateway Thule Prospective Prospector 07 Survey Mining Tutorial. | Image:Calypso Gateway Thule Prospective Prospector 07 Survey Mining Tutorial.jpg|'''Mining Tutorial 4'''<br />Mining overview | ||
Image:Calypso Gateway Thule Prospective Prospector 08 Survey Mining Tutorial. | Image:Calypso Gateway Thule Prospective Prospector 08 Survey Mining Tutorial.jpg|'''Mining Tutorial 5'''<br />How to equip the finder | ||
Image:Calypso Gateway Thule Prospective Prospector 09 Survey Mining Tutorial. | Image:Calypso Gateway Thule Prospective Prospector 09 Survey Mining Tutorial.jpg|'''Mining Tutorial 6'''<br />How to use the finder | ||
Image:Calypso Gateway Thule Prospective Prospector 10 Survey Mining Tutorial. | Image:Calypso Gateway Thule Prospective Prospector 10 Survey Mining Tutorial.jpg|'''Mining Tutorial 7'''<br />How to equip the extractor | ||
Image:Calypso Gateway Thule Prospective Prospector 11 Survey Mining Tutorial. | Image:Calypso Gateway Thule Prospective Prospector 11 Survey Mining Tutorial.jpg|'''Mining Tutorial 8'''<br />How to use the extractor | ||
Image:Calypso Gateway Thule Prospective Prospector 12 Survey Mining Tutorial. | Image:Calypso Gateway Thule Prospective Prospector 12 Survey Mining Tutorial.jpg|'''Mining Tutorial 9'''<br />Tips and special features 1 | ||
Image:Calypso Gateway Thule Prospective Prospector 13 Survey Mining Tutorial. | Image:Calypso Gateway Thule Prospective Prospector 13 Survey Mining Tutorial.jpg|'''Mining Tutorial 10'''<br />Tips and special features 2 | ||
Image:Calypso Gateway Thule Prospective Prospector 14 Equipping. | Image:Calypso Gateway Thule Prospective Prospector 14 Equipping.jpg|To equip the finder open the Inventory ({{Keypress|i}}), click the "Tools" tab (5th from above), right-click the [[Item:Genesis Star Rookie Finder (L)|Genesis Star Rookie Finder (L)]], choose "Equip" from the drop-down | ||
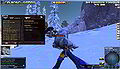
Image:Calypso Gateway Thule Prospective Prospector 15 Equipped. | Image:Calypso Gateway Thule Prospective Prospector 15 Equipped.jpg|The equiped finder is displayed in the [[Status panel]] and its interface is displayed too, at this point it is recommended to search for Energy Matter only - to do so activatt only the middle of the 3 buttons | ||
Image:Calypso Gateway Thule Prospective Prospector 16 Mining. | Image:Calypso Gateway Thule Prospective Prospector 16 Mining.jpg|Move ~50m away from the pod, operate the finder (=dropping a Survey Probe) by double-clicking the [[Health bar]] in the status panel | ||
Image:Calypso Gateway Thule Prospective Prospector 17 No resources found. | Image:Calypso Gateway Thule Prospective Prospector 17 No resources found.jpg|Wait for the surveying process to be completed - the finder will display a message, most likely "No resources found..." (NRF) | ||
Image:Calypso Gateway Thule Prospective Prospector 18 Travel To Scotts Ridge. | Image:Calypso Gateway Thule Prospective Prospector 18 Travel To Scotts Ridge.jpg|Moving ~50m before dropping the next probe increases the chance to find resources - in any case after you've dropped 5 probes a the objecive gets completed, a message pops up and the next objective is activated: "Travel to [[Scott's Ridge]]" | ||
Image:Calypso Gateway Thule Prospective Prospector 19 Scotts Ridge Map. | Image:Calypso Gateway Thule Prospective Prospector 19 Scotts Ridge Map.jpg|Scott's Ridge is located ~1600m straight-line distance to the southwest, so might want to take the car and follow the road | ||
Image:Calypso Gateway Thule Prospective Prospector 20 The Twins. | Image:Calypso Gateway Thule Prospective Prospector 20 The Twins.jpg|Pass through the rock formation known as "[[The Twins]]" | ||
Image:Calypso Gateway Thule Prospective Prospector 21 Scotts Ridge. | Image:Calypso Gateway Thule Prospective Prospector 21 Scotts Ridge.jpg|As soon as you approach [[Scott's Ridge]] the objective gets completed and the next "Talk to Rusty" gets activated | ||
Image:Calypso Gateway Thule Prospective Prospector 22 Rusty (67607, 69952, 734). | Image:Calypso Gateway Thule Prospective Prospector 22 Rusty (67607, 69952, 734).jpg|Rusty can be found at [[Position]] ~(67607, 69952, 734) at Scott's Ridge | ||
Image:Calypso Gateway Thule Prospective Prospector 23 Rusty Dialogue 01. | Image:Calypso Gateway Thule Prospective Prospector 23 Rusty Dialogue 01.jpg|As soon as you approach Rusty a dialogue is started, click through the dialogue | ||
Image:Calypso Gateway Thule Prospective Prospector 24 Rusty Dialogue 02. | Image:Calypso Gateway Thule Prospective Prospector 24 Rusty Dialogue 02.jpg|Click through the dialogue | ||
Image:Calypso Gateway Thule Prospective Prospector 25 Rusty Dialogue 03. | Image:Calypso Gateway Thule Prospective Prospector 25 Rusty Dialogue 03.jpg|Click through the dialogue | ||
Image:Calypso Gateway Thule Prospective Prospector 26 Rusty Dialogue 04. | Image:Calypso Gateway Thule Prospective Prospector 26 Rusty Dialogue 04.jpg|Click through the dialogue | ||
Image:Calypso Gateway Thule Prospective Prospector 27 Rifles Assemble 01. | Image:Calypso Gateway Thule Prospective Prospector 27 Rifles Assemble 01.jpg|The mission gets completed (reward: {{IconLink|Geology}}), click through the dialogue, and the next mission "Rifles, Assemble!" starts | ||
</gallery> | </gallery> | ||
<small>[[Calypso_Gateway#Calypso_Gateway_Missions_Walkthrough|Back up to missions list]]</small> | |||
===Rifles, Assemble=== | ===Rifles, Assemble=== | ||
Mission page: [[Mission:Rifles, Assemble]] | |||
<gallery> | <gallery> | ||
Image:Calypso Gateway Thule Prospective Prospector 27 Rifles Assemble 01. | Image:Calypso Gateway Thule Prospective Prospector 27 Rifles Assemble 01.jpg|The dialogue starts as soon as completing the preceding mission "Prospective Prospector", click through the dialogue | ||
Image:Calypso Gateway Thule Rifles Assemble 02 Talk to Amir. | Image:Calypso Gateway Thule Rifles Assemble 02 Talk to Amir.jpg|First objective: Talk to amir | ||
Image:Calypso Gateway Thule Rifles Assemble 03 Amir (67608, 69950, 738) | Image:Calypso Gateway Thule Rifles Assemble 03 Amir 67608 69950 738.jpg|Amir is to be found at [[Position]] ~(67608, 69950, 738) on the tower at [[Scott's Ridge]] | ||
Image:Calypso Gateway Thule Rifles Assemble 04 Talk To Amir Dialogue 01. | Image:Calypso Gateway Thule Rifles Assemble 04 Talk To Amir Dialogue 01.jpg|As soon as you approach him a dialogue starts, click through the dialogue | ||
Image:Calypso Gateway Thule Rifles Assemble 05 Talk To Amir Dialogue 02. | Image:Calypso Gateway Thule Rifles Assemble 05 Talk To Amir Dialogue 02.jpg|Click through the dialogue | ||
Image:Calypso Gateway Thule Rifles Assemble 06 Talk To Amir Dialogue 03. | Image:Calypso Gateway Thule Rifles Assemble 06 Talk To Amir Dialogue 03.jpg|Click through the dialogue | ||
Image:Calypso Gateway Thule Rifles Assemble 07 Talk To Amir Dialogue 04. | Image:Calypso Gateway Thule Rifles Assemble 07 Talk To Amir Dialogue 04.jpg|Click through the dialogue, next objective: "Gather The Components" | ||
Image:Calypso Gateway Thule Rifles Assemble 08 Help Terminal 01. | Image:Calypso Gateway Thule Rifles Assemble 08 Help Terminal 01.jpg|A [[Help Terminal]] containing a brief construction tutorial can be found just down the stairs | ||
Image:Calypso Gateway Thule Rifles Assemble 09 Help Terminal Construction 02. | Image:Calypso Gateway Thule Rifles Assemble 09 Help Terminal Construction 02.jpg|Help Terminal menu | ||
Image:Calypso Gateway Thule Rifles Assemble 10 Help Terminal Construction 03. | Image:Calypso Gateway Thule Rifles Assemble 10 Help Terminal Construction 03.jpg|'''Construction Tutorial 1'''<br /> | ||
Image:Calypso Gateway Thule Rifles Assemble 11 Help Terminal Construction 04. | Image:Calypso Gateway Thule Rifles Assemble 11 Help Terminal Construction 04.jpg|'''Construction Tutorial 2'''<br /> | ||
Image:Calypso Gateway Thule Rifles Assemble 12 Help Terminal Construction 05. | Image:Calypso Gateway Thule Rifles Assemble 12 Help Terminal Construction 05.jpg|'''Construction Tutorial 3'''<br /> | ||
Image:Calypso Gateway Thule Rifles Assemble 13 Help Terminal Construction 06. | Image:Calypso Gateway Thule Rifles Assemble 13 Help Terminal Construction 06.jpg|'''Construction Tutorial 4'''<br /> | ||
Image:Calypso Gateway Thule Rifles Assemble 14 Gather The Components 01 (67610, 69937, 734) | Image:Calypso Gateway Thule Rifles Assemble 14 Gather The Components 01 67610, 69937, 734.jpg|The components can be found in a box just a few meters away at Position ~(67610, 69937, 734) | ||
Image:Calypso Gateway Thule Rifles Assemble 15 Gather The Components 02. | Image:Calypso Gateway Thule Rifles Assemble 15 Gather The Components 02.jpg|Operate each component in the box | ||
Image:Calypso Gateway Thule Rifles Assemble 16 Gather The Components 03. | Image:Calypso Gateway Thule Rifles Assemble 16 Gather The Components 03.jpg|The progress gets tracked... | ||
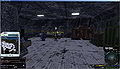
Image:Calypso Gateway Thule Rifles Assemble 17 Manufacture Three Rifles 01. | Image:Calypso Gateway Thule Rifles Assemble 17 Manufacture Three Rifles 01.jpg|As soon as you all necessary components are gathered there's a new objective: "Manufacture Three Rifles" - to do so operate the "Automatic Construction Terminal" just right of the box with the components | ||
Image:Calypso Gateway Thule Rifles Assemble 18 Manufacture Three Rifles 02. | Image:Calypso Gateway Thule Rifles Assemble 18 Manufacture Three Rifles 02.jpg|Three "Genesis Star Battle Rifles" will be displayed in a [[Loot window]], next objective: "Deliver The Rifles To Amir" | ||
Image:Calypso Gateway Thule Rifles Assemble 19 Deliver The Rifles To Amir. | Image:Calypso Gateway Thule Rifles Assemble 19 Deliver The Rifles To Amir.jpg|As soon as you approach Amir a dialogue pops up, click through the dialogue | ||
Image:Calypso Gateway Thule Rifles Assemble 20 Deliver The Rifles To Amir 02. | Image:Calypso Gateway Thule Rifles Assemble 20 Deliver The Rifles To Amir 02.jpg|Drog'n'drop the 3 rifles from the inventory into the Quest Item window, confirm with the Accept button | ||
Image:Calypso Gateway Thule Rifles Assemble 21 Shooting Star 01.jpg|The mission gets completed (reward: {{IconLink|Laser Weaponry Technology}}), and the dialogue continues with the next mission "Shooting Star" | |||
</gallery> | </gallery> | ||
<small>[[Calypso_Gateway#Calypso_Gateway_Missions_Walkthrough|Back up to missions list]]</small> | |||
===Shooting Star=== | ===Shooting Star=== | ||
Mission page: [[Mission:Shooting Star]] | |||
<gallery> | <gallery> | ||
Image:Calypso Gateway Thule Rifles Assemble 21 Shooting Star 01. | Image:Calypso Gateway Thule Rifles Assemble 21 Shooting Star 01.jpg|The dialogue starts as soon as completing the preceding mission "Rifles, Assemble!", click through the dialogue | ||
Image:Calypso Gateway Thule Shooting Star 02. | Image:Calypso Gateway Thule Shooting Star 02.jpg|First objective: "Talk To Rusty" | ||
Image:Calypso Gateway Thule Shooting Star 03. | Image:Calypso Gateway Thule Shooting Star 03.jpg|Rusty can be found at Position ~(67607, 69952, 734) at Scott's Ridge, as soon as you approach him a dialogue starts, click through the dialogue | ||
Image:Calypso Gateway Thule Shooting Star 04. | Image:Calypso Gateway Thule Shooting Star 04.jpg|Click through the dialogue | ||
Image:Calypso Gateway Thule Shooting Star 05. | Image:Calypso Gateway Thule Shooting Star 05.jpg|Click through the dialogue | ||
Image:Calypso Gateway Thule Shooting Star 06. | Image:Calypso Gateway Thule Shooting Star 06.jpg|Click through the dialogue | ||
Image:Calypso Gateway Thule Shooting Star 07. | Image:Calypso Gateway Thule Shooting Star 07.jpg|Click through the dialogue | ||
Image:Calypso Gateway Thule Shooting Star 08. | Image:Calypso Gateway Thule Shooting Star 08.jpg|You receive a [[Item:Slidek P30 (L)|Slidek P30 (L)]] grenade launcher, 2k [[Item:Explosive Projectile|Explosive Projectiles]] (ammunition) and a nw objective: "Search for traces of the missing shuttle craft" | ||
Image:Calypso Gateway Thule Shooting Star 09 Map. | Image:Calypso Gateway Thule Shooting Star 09 Map.jpg|Location of the shuttle craft on the map | ||
Image:Calypso Gateway Thule Shooting Star 10 Missing shuttle craft (67501, 70346, 678) | Image:Calypso Gateway Thule Shooting Star 10 Missing shuttle craft 67501, 70346, 678.jpg|The shuttle craft is located at [[Postion]] ~(67501, 70346, 678), the "[[Starfinder Crash Site]]" | ||
Image:Calypso Gateway Thule Shooting Star 11 Inspect-A-Gadget 01. | Image:Calypso Gateway Thule Shooting Star 11 Inspect-A-Gadget 01.jpg|As soon as you approach the shuttle craft the misson gets completed (reward: {{IconLink|Support Weapon Systems}} skill) and the dialogue for the next mission "Inspect-A-Gadget" starts | ||
</gallery> | </gallery> | ||
<small>[[Calypso_Gateway#Calypso_Gateway_Missions_Walktrough|Back up to missions list]]</small> | |||
===Inspect-A-Gadget=== | ===Inspect-A-Gadget=== | ||
Mission page: [[Mission:Inspect-A-Gadget]] | |||
<gallery> | <gallery> | ||
Image:Calypso Gateway Thule Shooting Star 11 Inspect-A-Gadget 01. | Image:Calypso Gateway Thule Shooting Star 11 Inspect-A-Gadget 01.jpg|The dialogue starts as soon as completing the preceding mission "Shooting Star", click through the dialogue | ||
Image:Calypso Gateway Thule Inspect-A-Gadget 02 Flight Data Recorder. | Image:Calypso Gateway Thule Inspect-A-Gadget 02 Flight Data Recorder.jpg|The objective is to "Investigate the wreckage" or more precisely to operate the Flight Data Recoder at the wreckage | ||
Image:Calypso Gateway Thule Inspect-A-Gadget 03 That Other May Live 01. | Image:Calypso Gateway Thule Inspect-A-Gadget 03 That Other May Live 01.jpg|As soon as you operate the recorder the mission gets completed (reward: {{IconLink|Courage}}) and the dialogue for the next mission "That others may live" starts | ||
</gallery> | </gallery> | ||
<small>[[Calypso_Gateway#Calypso_Gateway_Missions_Walkthrough|Back up to missions list]]</small> | |||
===That Others May Live=== | ===That Others May Live=== | ||
Mission page: [[Mission:That Others May Live]] | |||
<gallery> | <gallery> | ||
Image:Calypso Gateway Thule Inspect-A-Gadget 03 That Other May Live 01. | Image:Calypso Gateway Thule Inspect-A-Gadget 03 That Other May Live 01.jpg|The dialogue starts as soon as completing the preceding mission "Inspect-A-Gadget", click through the dialogue | ||
Image:Calypso Gateway Thule That Other May Live 02. | Image:Calypso Gateway Thule That Other May Live 02.jpg|Click through the dialogue | ||
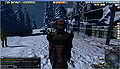
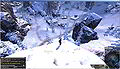
Image:Calypso Gateway Thule That Other May Live 03 | Image:Calypso Gateway Thule That Other May Live 03 66962, 70893, 723.jpg|Next objective: "Find The Surviving Crew Member", about 700m to the northwest | ||
Image:Calypso Gateway Thule That Other May Live 04 Jotun Falls. | Image:Calypso Gateway Thule That Other May Live 04 Jotun Falls.jpg|The crew member is located in an area called [[Jotun Falls]] | ||
Image:Calypso Gateway Thule That Other May Live 05 Surviving crew member. | Image:Calypso Gateway Thule That Other May Live 05 Surviving crew member.jpg|The approximate [[Position]] of the crew member is (66962, 70893, 723), as soon as you approach there's a new objective: "Investigate The Device" | ||
Image:Calypso Gateway Thule That Other May Live 06 Communicator. | Image:Calypso Gateway Thule That Other May Live 06 Communicator.jpg|The device is a "Communicator" next to the crew member, as soon as you operate it the mission gets completed (reward {{IconLink|Anatomy}} skill) and the dialogue for the next mission "The Grande Finale" starts | ||
</gallery> | </gallery> | ||
<small>[[Calypso_Gateway#Calypso_Gateway_Missions_Walkthrough|Back up to missions list]]</small> | |||
===The Grand Finale=== | ===The Grand Finale=== | ||
Mission page: [[Mission:The Grand Finale]] | |||
<gallery> | <gallery> | ||
Image:Calypso Gateway Thule The Grand Finale 01. | Image:Calypso Gateway Thule The Grand Finale 01.jpg | ||
Image:Calypso Gateway Thule The Grand Finale 02. | Image:Calypso Gateway Thule The Grand Finale 02.jpg | ||
Image:Calypso Gateway Thule The Grand Finale 03 Robot Structure (67088, 70780, 687). | Image:Calypso Gateway Thule The Grand Finale 03 Robot Structure (67088, 70780, 687).jpg | ||
Image:Calypso Gateway Thule The Grand Finale 04 Arm The Explosives. | Image:Calypso Gateway Thule The Grand Finale 04 Arm The Explosives.jpg | ||
Image:Calypso Gateway Thule The Grand Finale 05 Explosives. | Image:Calypso Gateway Thule The Grand Finale 05 Explosives.jpg | ||
Image:Calypso Gateway Thule The Grand Finale 06 Rusty 01. | Image:Calypso Gateway Thule The Grand Finale 06 Rusty 01.jpg | ||
Image:Calypso Gateway Thule The Grand Finale 07 Rusty 02. | Image:Calypso Gateway Thule The Grand Finale 07 Rusty 02.jpg | ||
Image:Calypso Gateway Thule The Grand Finale 08 Hangar Hangout 01. | Image:Calypso Gateway Thule The Grand Finale 08 Hangar Hangout 01.jpg | ||
</gallery> | </gallery> | ||
<small>[[Calypso_Gateway#Calypso_Gateway_Missions_Walkthrough|Back up to missions list]]</small> | |||
===Hangar Hangout=== | ===Hangar Hangout=== | ||
Mission page: [[Mission:Hangar Hangout]] | |||
<gallery> | <gallery> | ||
Image:Calypso Gateway Thule The Grand Finale 08 Hangar Hangout 01. | Image:Calypso Gateway Thule The Grand Finale 08 Hangar Hangout 01.jpg | ||
Image:Calypso Gateway Thule Hangar Hangout 02 Spaceport Helios Map. | Image:Calypso Gateway Thule Hangar Hangout 02 Spaceport Helios Map.jpg | ||
Image:Calypso Gateway Thule Hangar Hangout 03 Spaceport Helios (69260, 70029, 719). | Image:Calypso Gateway Thule Hangar Hangout 03 Spaceport Helios (69260, 70029, 719).jpg | ||
Image:Calypso Gateway Thule Hangar Hangout 04 Spaceport Helios 02. | Image:Calypso Gateway Thule Hangar Hangout 04 Spaceport Helios 02.jpg | ||
Image:Calypso Gateway Thule Hangar Hangout 05 A New Beginning 01. | Image:Calypso Gateway Thule Hangar Hangout 05 A New Beginning 01.jpg | ||
</gallery> | </gallery> | ||
<small>[[Calypso_Gateway#Calypso_Gateway_Missions_Walkthrough|Back up to missions list]]</small> | |||
===A New Beginning=== | ===A New Beginning=== | ||
Mission page: [[Mission:A New Beginning]] | |||
<big>'''Please note: By finishing this mission you will leave Calypso Gateway and you are not supposed to come back. Please make sure you don't leave items in your Calypso Gateway storage and you have your vehicle in your inventory. Also you might want to explore Calypso Gateway a little bit more before leaving. As a player of [[Monria]] you leave Calypso Gateway to [[Monria Hub]], only Calypso and ROCKtropia players leave to [[Camp Icarus]].'''</big> | |||
<gallery> | <gallery> | ||
Image:Calypso Gateway Thule Hangar Hangout 05 A New Beginning 01. | Image:Calypso Gateway Thule Hangar Hangout 05 A New Beginning 01.jpg | ||
Image:Calypso Gateway Thule A New Beginning 02. | Image:Calypso Gateway Thule A New Beginning 02.jpg | ||
Image:Calypso Gateway Thule A New Beginning 02 Lieutenant Smith (69265, 70061, 719). | Image:Calypso Gateway Thule A New Beginning 02 Lieutenant Smith (69265, 70061, 719).jpg | ||
Image:Calypso Gateway Thule A New Beginning 03. | Image:Calypso Gateway Thule A New Beginning 03.jpg|Recommended to further explore Calypso Gateway and try a few things | ||
File:Calypso_Gateway_Exit_Port_Atlantis_Camp_Icarus. | File:Calypso_Gateway_Exit_Port_Atlantis_Camp_Icarus.jpg|Doesn't take you to directly to [[Port Atlantis]] (PA) but to [[Camp Icarus]] (CI) south-east of PA. | ||
</gallery> | </gallery> | ||
<small>[[Calypso_Gateway#Calypso_Gateway_Missions_Walkthrough|Back up to missions list]]</small> | |||
===What to do after Calypso Gateway=== | |||
====Planet Calypso players==== | |||
For Calypso players the next stop after Calypso Gateway is [[Camp Icarus]]. There are a few new missions available at and around Camp Icarus, as well as some other interesting activities and locations. Also Camp Icarus is quite populated with other beginners and veteran players as well. You might want to proceed doing the missions and explore the environment. | |||
====ROCKtropia players==== | |||
Just as for Calypso players for ROCKtropia players the next stop after Calypso Gateway is [[Camp Icarus]] as well. You might want to enjoy what Camp Icarus has to offer (see above) or visit the Sky lounge in [[Port Atlantis]] and taking advantage of the free trip to ROCKtropia. | |||
====Monria players==== | |||
For [[Monria]] players the next stop after Calypso Gateway is [[Monria Hub]]. There are a few new missions available at Monria, as well as interesting locations to explore. | |||
==Calypso Gateway maps and locations== | |||
[[File:Calyps_Gateway_map_empty_512x512.jpg|768px|link=none]] | |||
===Genesis Alpha Station=== | |||
... | |||
===Lake Phrys=== | |||
... | |||
===Camp Amundsen=== | |||
... | |||
===The supply pod=== | |||
... | |||
===The Twins=== | |||
... | |||
===Scott's Ridge=== | |||
... | |||
===Starfinder Crash Site=== | |||
... | |||
===Jotun Falls=== | |||
... | |||
===Robot Structure=== | |||
... | |||
===Spaceport Helios=== | |||
... | |||
==Media== | ==Media== | ||
====Images==== | ====Images==== | ||
====Video==== | ====Video==== | ||
Funny but not recommended to do:<br /> | |||
{{Youtube|Wg83wj8nMBA|big}} | |||
====Original press release==== | |||
Gothenburg, Sweden - Planet Calypso AB, developer and publisher of Planet Calypso, sci-fi MMO based in the Entropia Universe, announced today that new players now have easier access to the game. Calypso's improved Gateway gives beginning colonists a dedicated location in which to start out, get missions and learn about the gameplay and economics of the game in a safe environment. | |||
Planet Calypso is known for its real-cash economy, sci-fi backstory, lush visuals and a very steep learning curve. Enter Calypso Gateway, the innovative starting point for newcomers. With this new update, the area now features a simpler linear layout. It also contains significantly more information about the gameplay of Planet Calypso and Entropia Universe. The "New Colonist Experience" even includes free items and skills to get new players going with weapons, ammo, armor and even a vehicle. | |||
The Calypso Gateway is on its own island allowing players a safe place to get to know the planet and Entropia Universe. It is the first point-of-contact with the game, after the avatar creation process. Calypso Gateway features unique introductory missions to orient new players and make sure they have vital equipment. Newcomers will be able to engage in hunting, mining and crafting, using the equipment given. The tutorial-like mission structure allows players to learn about Calypso, the Real Cash Economy model and the way the basic features work. | |||
Planet Calypso is the oldest of the planets in the Entropia Universe, with over one million registered accounts and over $400 million USD per year in user-to-user transactions. As part of the largest real economy game in the world players have the ability to participate in a science-fiction MMO where they have no monthly costs. Instead players have the ability to deposit real funds for their adventures on Calypso, or withdraw funds at any time for use in the real world. Planet Calypso is a free download available at the game's official website at http://www.planetcalypso.com. | |||
About Planet Calypso AB | |||
Planet Calypso AB develops and markets Planet Calypso, a Massively Multiplayer Online Role Playing Game (MMORPG) based on the Entropia Platform, and is part of the Entropia Universe. Set in a distant future, the planet Calypso is home to an expanding human colony engaged with the natural and economic elements of establishing their new civilization. | |||
For more information on Planet Calypso AB (PCAB) and Planet Calypso please contact us at the numbers below or go to our website at http://www.planetcalypso.com. | |||
==Links, references, contributors, categories== | ==Links, references, contributors, categories== | ||
[http://www.entropiaplanets.com/forums/calypso-gateway.90/ Calypso Gateway] (Forum section on entropiaplanets.com) | * [http://www.entropiaplanets.com/forums/calypso-gateway.90/ Calypso Gateway] (Forum section on entropiaplanets.com) | ||
* [[Calypso Gateway (Old)]] - first version of the area before it was completely redesigned in VU ??? | |||
* http://www.entropiaplanets.com/threads/planet-calypso-rejuvenates-gateway-for-new-players.8024/ | |||
* http://www.entropiaplanets.com/threads/calypso-gateway-rejuvenated-for-new-players.8006/ | |||
<references /> | <references /> | ||
| Line 317: | Line 444: | ||
[[Category:Calypso Gateway]] [[Category:Guides]] [[Category:For Beginners]] [[Category:Planet Calypso]] [[Category:Planet Calypso Area Guides]] | [[Category:Calypso Gateway]] [[Category:Guides]] [[Category:For Beginners]] [[Category:Planet Calypso]] [[Category:Planet Calypso Area Guides]] | ||
[[Category:Monria Area Guides]] | |||
Latest revision as of 16:49, 16 July 2018
Latest Forum Threads
Find more in the Tutorials, Guides and Help forum section! |
Monria Beginner's Flow: Genesis > Crystalline Cavern > Calypso Gateway > Monria Hub
Calypso Gateway[edit]
Calypso Gateway is the beginners main tutorial area for new players of Planet Calypso, ROCKtropia and Monria. The area is accessed by leaving Crystalline Cavern. From Calypso Gateway Planet Calypso and ROCKtropia players proceed to Camp Icarus, Monria players proceed to Monria Hub.
General notes: 1. The images in this guide will probably not show the visuals you experience because these are depending on graphics setting and time of arrival (there's time of day lighting) 2. The guide is following the experience of a Planet Calypso player, there might be minor differences for ROCKtropia and Monria players. 3. MindArk is constantly reviewing the area and applying minor improvements
How to get to Calypso Gateway[edit]
You can enter Calypso Gateway by leaving the Crystalline Cavern. You are not supposed to go back to the Crystalline Cavern, so you might want to make sure you have finished the Target Practise mission there.
Old player wanting to go through the gateway mission chain? Start there: Crystalline Cavern for old players
Arrival at Calypso Gateway[edit]
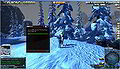
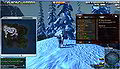
You arrive at Calypso Gateway approximately at Position (66680, 71404, 878). You can check your position by pressing P. When arriving at Calypso Gateway you should have a mission called "Find Mr Yoshida", check the mission section further below.

Arriving at Calypso Gateway
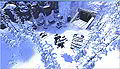
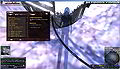
Arrival from above


Calypso Gateway Missions Walkthrough[edit]
On Calypso Gateway you can go through a set of story-driven tutorial missions which give you a first overview of the game's features and functionality as well as award you a number of items and skills. It is highly recommended to do these missions but there is also the option to bypass the tutorial which is not recommended, not at last because you are not supposed to get back to Calypso Gateway.
These are the 18 missions:
- Find Mr Yoshida
- Report To Jimmy
- Limited Connectivity
- Pest Eradication
- Power Struggle
- A Message From Yoshida
- Unfinished Business
- Analyzing The Sample
- Fuel My Fire
- Another Message From Yoshida
- Prospective Prospector
- Rifles, Assemble
- Shooting Star
- Inspect-A-Gadget
- That Others May Live
- The Grand Finale
- Hangar Hangout
- A New Beginning
Read also:
Find Mr Yoshida[edit]
Mission page: Mission:Find Mr Yoshida
"Find Mr Yoshida" is the first mission after your arrival on Calypso Gateway and it's a very simple one. You just need to walk a few steps from your point of a arrival towards Mr Yoshida and the mission is done.
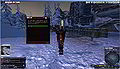
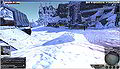
Mr Yoshida is located just a few straight steps from the arrival.

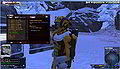
Mr Yoshida is easy to spot by the yellow exclamation mark above his head symbolizing relevancy for progress in a mission.
As soon as you approach Mr Yoshida the mission gets completed and you are offered the next mission "Report To Jimmy".


Report To Jimmy[edit]
Mission page: Mission:Report To Jimmy
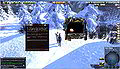
It is not recommended to skip the whole tutorial described on this page and proceed to Camp Icarus, but at this point you have the option.
Dialogue
Dialogue
Dialogue
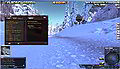
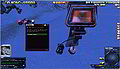
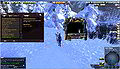
The mission in the Quest/Mission Log
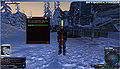
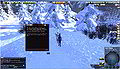
Jimmy is just about ~40m away. He should have a target marker indicating the distance. Also his position appears as a waypoint on the Radar and the Map (press M to open/close the map).
Jimmy at (66732, 71382, 876)
(to display your own postion in the chat window press P)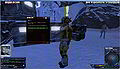
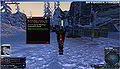
As soon as you approach him the mission gets completed and a dialogue pops up


Limited Connectivity[edit]
Mission page: Mission:Limited Connectivity
Jimmy at (66732, 71382, 876), as soon as you approach a dialogue should pop up
Dialogue (click through)
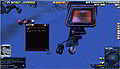
You finally receive the quest which consists of finding a connection issue
The connection issue is just about 50m to the northwest, follow the waypoint marker on the radar and/or the distance marker on screen
As soon as you approach the location of the connection issue a dialogue pops up and the quest proceeds
The next tasks is to report back to Jimmey
And Jimmy should be located just about 50m to the south-east, follow the waypoint marker on the radar and/or the distance marker on screen
As soon as you approach Jimmy a dialogue pops up, clicking through it completes the quest will finally lead to the next: "Pest Eradication"
Dialogue (click through)
Intro to the next quest "Pest Eradication"
"Limited Connectivity" completed / "Pest Eradication" assigned


Pest Eradication[edit]
Mission page: Mission:Pest Eradication The introductionary dialogue to this mission is to be found at the end of the preceding mission "Limited Connectivity".
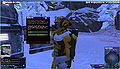
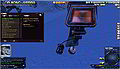
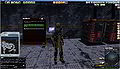
The mission is started as soon as completing the preceding "Limited Connectivity", NPC Jimmy at (66732, 71382, 876). The objective is to kill 3 Pygmy Chompers

To kill creatures you need to equip a weapon:
1. Press I on your keyboard to open the inventory.
2. Click the "Weapons" category (4th from above in the right menu bar of the Inventory window)
3. Right-click the weapon and left-click "Equip" in the dropdown menu
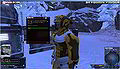
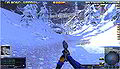
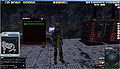
Pygmy Chompers can be found ~100m down the path leading westwards
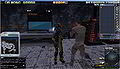
For killing creatures you can switch between two modes by pressing space:
- "Aim mode": aim at creature the with crosshairs, click left mouse-button to shoot
- "Cursor mode": press left mouse button on a creature and drag the health bar, left-click the health bar to shoot
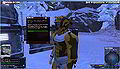
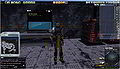
To loot a dead creature in "Aim mode" double-click the carcass or in "Cursor mode", right-click the health bar and choose "Loot" from the dropdown menu, you either get a "no loot" message in the chat or a loot window
The progress in the mission is tracked in the Quest/Mission Log, for example "Pygmy Chompers killed (2/3)"
As soon as you have killed 3 Pygmy Chompers the objective gets completed the the next activated, which is "Return to Jimmy"
Jimmy is still located at the exit of Genesis Alpha Station, just as at the start of the mission
As soon as you approach Jimmy a dialogue pops up, click "Yes."
The mission gets completed and the dialogue continues with the next mission "Power Struggle"


Power Struggle[edit]
Mission page: Mission:Power Struggle
The dialogue is started as soon as completing the preceding mission "Pest Eradication", NPC Jimmy at (66732, 71382, 876).
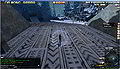
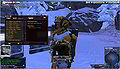
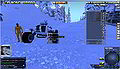
The objective is to locate an unpowered turret and replace the battery. To avoid you need to walk all the way you are given a car and fuel.
For further info regarding vehicles you can consult the Help Terminal or just the following images and instructions in this section.
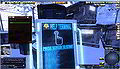
Help Terminal Menu

Vehicle How-to
The vehicle can be found in the inventory i) under the "Miscellaneous" tab.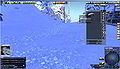
Vehicle How-to
Right-click it and choose "Spawn vehicle" from the dropdown.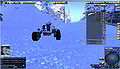
Vehicle How-to
The mouse pointer is replaced with the vehicle, move it to an appropriate place on the ground, if neccessary rotate it by pressing the right mouse button, spawn it by clicking the left mouse button.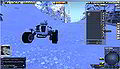
Vehicle How-to
The fuel (Oil) can be found in the inventory i) under the "Mined Resources" tab.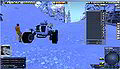
Vehicle How-to
To add fuel drag'n'drop the Oil icon from the inventory onto the spawned vehicle.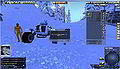
Vehicle How-to
Confirm by clicking the "Ok" button:
Vehicle How-to
To enter the vehicle right-click it and choose "Operate" from the dropdown, alternatively simply double click it.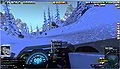
Vehicle How-to
Cars can be easily steered using W A S D - to exit the vehicle right-click anywhere and choose "Exit Seat" from the dropdown.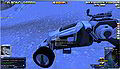
Vehicle How-to
To put the vehicle back into inventory right-click the spawned vehicle and choose "Pick up" from the dropdown.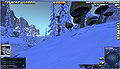
The unpowered turret can be found at (66843, 71384, 863)
As soon as you approach the turret the mission is updated with a new objective ("Replace The Battery").
The battery can be found on the ground right at the turret, right-click it and choose "Operate" from the dropdown.
Click through the dialogue
The mission gets completed (rewarded with Electonics skills) and the dialogue for the next mission "A Message From Yoshida" starts


A Message From Yoshida[edit]
Mission page: Mission:A Message From Yoshida
The dialogue is started as soon as completing the preceding mission "Power Struggle", click through the dialogue
Click through the dialogue
The objective is to "Report To Paul Reinhardt"
Paul Reinhardt is to be found further down the road at ~(67352, 71406, 769)
As soon as you approach Paul the mission gets completed (reward: Vivo Explorer (L)) and the dialogue for the next mission "Unfinished Business" starts


Unfinished Business[edit]
Mission page: Mission:Unfinished Business
The dialogue is started as soon as completing the preceding mission "A Message From Yoshida", the objective is to collect ice-core samples at Lake Phrys, click through the dialogue
Click through the dialogue
Objective: Locate the Drill Rig
The drill rig can be found at Lake Phrys at Position ~(67500, 71145, 733)
Next objective: "Gather the sample", operate the Drill Rig to do so
Next objective: "Return to Paul Reinhardt"
Paul Reinhardt is still to be found at ~(67352, 71406, 769), click through the dialogue
The mission gets completed (reward: Skill:First Aid Skill) and the dialogue for the next mission "To Camp Amundsen" starts


To Camp Amundsen[edit]
Mission page: Mission:To Camp Amundsen
The dialogue starts as soon as completing the preceding mission "Unfinished Business", click through the dialogue
The objective is to deliver the sample to Camp Amundsen
Camp Amundsen is located further down the road
The recipient of the sample is to be found at Position ~(68035, 71272, 683)
Click through the dialogue
The mission gets completed (reward:
 Athletics) and the dialogue for the next mission "Analyzing the sample" starts


Analyzing The Sample[edit]
Mission page: Mission:Analyzing The Sample
The dialogue starts as soon as completing the preceding mission "To Camp Amundsen", click through the dialogue

Click through the dialogue
Choose whether or not to read the short intro to the Entropia Universe economy, in case you choose not to read it in game you can still read it on the following 5 images
Economy Intro 1
How to use the Trade Terminal (TT)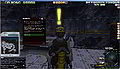
Economy Intro 2
How to buy things from the Trade Terminal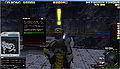
Economy Intro 3
What are PED?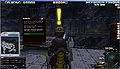
Economy Intro 4
How do you get PED? (see also: Depositing money into Entropia Universe and About Making Money in Entropia Universe
Click through the dialogue
You receive 2 Hides and the actual mission starts, objective: Purchase 100 Synthetic Mind Essence
The next Trade Terminal is located at Position ~(68019, 71201, 683)
Operate the Trade Terminal (right-click and choose operate from the drop-down OR double-click the Trade Terminal
Selling the Hides
Click the "Sell" tab ("Buy" tab is chosen by default)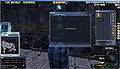
Selling the Hides
Inventory open automatically, choose the "Materials" tab (6th from above), drag'n'drop the Hides from the Invetory onto the Trade Terminal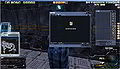
Selling the Hides
Click the "SELL" button at the bottom of the Trade Terminal (TT) window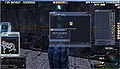
Selling the Hides
Confirm the trade by clicking the "Ok" button.

Buying the Synthtic Mind Essence (SME)
Click the the "BUY" tab in the TT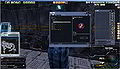
Buying the SME
Open the "Ammunition" category, choose "Synthetic Mind Essence", set "Quantity" to 100 with the tiny arrow buttons, and click the "BUY" button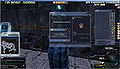
Buying the SME
Confirm the trade by clicking the "Ok" button.
The objective (Purchase 100 SME) gets completed and the next "Bring The Essence" to Lauren Lord" is starts
Lauren Lord can be found at Position ~(78034 71280, 683), a soon as you approach her a dialogue starts, click through the dialogue
A quest items window and the Inventory open automatically, in the Inventory window select the "Mindforce" tab
Drag and drop the SME icon from the Inventory into the quest items window and confirm with the "Accept" button
Click through the dialogue, the mission gets completed and the next mission "Fuel My Fire" can be started at Lauren Lord immediately


Fuel My Fire[edit]
Mission page: Mission:Fuel My Fire
This mission is given by Lauren Lord at Position ~(78034 71280, 683) in Camp Amundsen, click through the dialogue
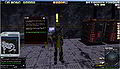
Click through the dialogue
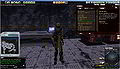
First objective: Locate The Oil Field
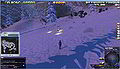
The Oil Field is located at Position ~(67962, 71028, 722)
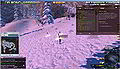
The Oil Field has 3 claim rods, operate (right-click -> "Operate" OR double-click) one after another to extract Crude Oil
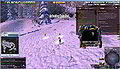
The extracted oil will be shown in a Loot Window, the progress in the mission objective is tracked in the Quest/Mission Log: "Oil Barrels Extracted: (X/10)
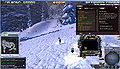
Once 10 barrels are extracted the next objective is to "Deliver The Oil To Lauren Lord"
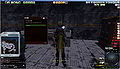
Lauren is still located at Position ~(78034 71280, 683) in Camp Amundsen, click through the dialogue
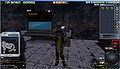
A Quest Items window and Inventory open automatically, the Oil is to be found under the "Mined Resources" tab
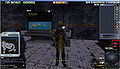
Drag'n'drop the Oil onto the Quest Items window and click the Accept button
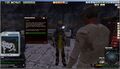
The mission gets completed and the dialogue of the next mission "Another Message From Yoshida" starts


Another Message From Yoshida[edit]
Mission page: Mission:Another Message From Yoshida
The dialogue starts as soon as completing the preceding mission "Fuel My Fire", click through the dialogue
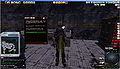
Click through the dialogue
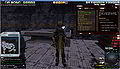
First objective: "Locate The Supply Pod"
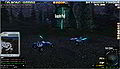
The supply is located further down the road leaving Camp Amundsen at Position ~(68767, 71043, 657)
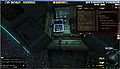
Retriev the mining equipment by operating each piece:
-Genesis Star Rookie Finder (L)
-Genesis Star Rookie Extractor (L)
-Survey Probes
As soon as you have all equipment the mission gets completed (reward:
 Geology) and the dialogue for the next mission "Prospective Prospector" starts


Prospective Prospector[edit]
Mission page: Mission:Prospective Prospector
The dialogue starts as soon as completing the preceding mission "Another Message From Yoshida", click through the dialogue
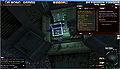
The Objective is to "Survey the Area For Potential Resources"
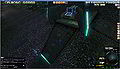
The Help Terminal right in front of the pod contains a brief Mining Tutorial, you can read it there or on the following 10 images, alternatively everything is explained again after the next 10 images (a detailed mining guide can be found there: Mining guide
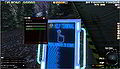
Mining Tutorial 1
Help Terminal Menu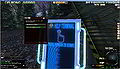
Mining Tutorial 2
Quick overview or more detailed?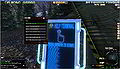
Mining Tutorial 3
Tutorial Table of Contens
Mining Tutorial 4
Mining overview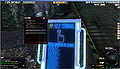
Mining Tutorial 5
How to equip the finder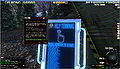
Mining Tutorial 6
How to use the finder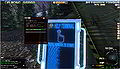
Mining Tutorial 7
How to equip the extractor
Mining Tutorial 8
How to use the extractor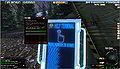
Mining Tutorial 9
Tips and special features 1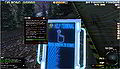
Mining Tutorial 10
Tips and special features 2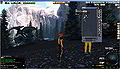
To equip the finder open the Inventory (i), click the "Tools" tab (5th from above), right-click the Genesis Star Rookie Finder (L), choose "Equip" from the drop-down
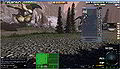
The equiped finder is displayed in the Status panel and its interface is displayed too, at this point it is recommended to search for Energy Matter only - to do so activatt only the middle of the 3 buttons
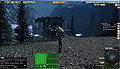
Move ~50m away from the pod, operate the finder (=dropping a Survey Probe) by double-clicking the Health bar in the status panel
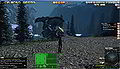
Wait for the surveying process to be completed - the finder will display a message, most likely "No resources found..." (NRF)
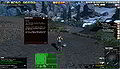
Moving ~50m before dropping the next probe increases the chance to find resources - in any case after you've dropped 5 probes a the objecive gets completed, a message pops up and the next objective is activated: "Travel to Scott's Ridge"
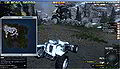
Scott's Ridge is located ~1600m straight-line distance to the southwest, so might want to take the car and follow the road
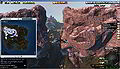
Pass through the rock formation known as "The Twins"
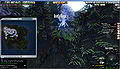
As soon as you approach Scott's Ridge the objective gets completed and the next "Talk to Rusty" gets activated
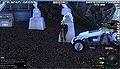
Rusty can be found at Position ~(67607, 69952, 734) at Scott's Ridge
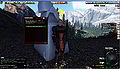
As soon as you approach Rusty a dialogue is started, click through the dialogue
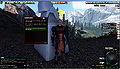
Click through the dialogue
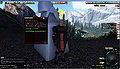
Click through the dialogue
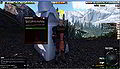
Click through the dialogue
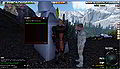
The mission gets completed (reward:
Geology), click through the dialogue, and the next mission "Rifles, Assemble!" starts


.jpg)


Rifles, Assemble[edit]
Mission page: Mission:Rifles, Assemble
The dialogue starts as soon as completing the preceding mission "Prospective Prospector", click through the dialogue
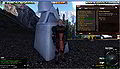
First objective: Talk to amir
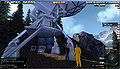
Amir is to be found at Position ~(67608, 69950, 738) on the tower at Scott's Ridge
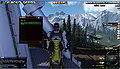
As soon as you approach him a dialogue starts, click through the dialogue
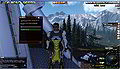
Click through the dialogue
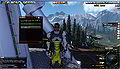
Click through the dialogue
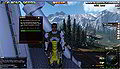
Click through the dialogue, next objective: "Gather The Components"
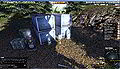
A Help Terminal containing a brief construction tutorial can be found just down the stairs
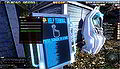
Help Terminal menu
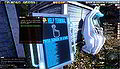
Construction Tutorial 1
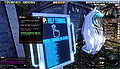
Construction Tutorial 2
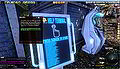
Construction Tutorial 3
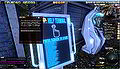
Construction Tutorial 4
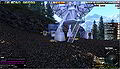
The components can be found in a box just a few meters away at Position ~(67610, 69937, 734)
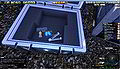
Operate each component in the box

The progress gets tracked...
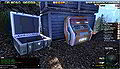
As soon as you all necessary components are gathered there's a new objective: "Manufacture Three Rifles" - to do so operate the "Automatic Construction Terminal" just right of the box with the components
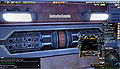
Three "Genesis Star Battle Rifles" will be displayed in a Loot window, next objective: "Deliver The Rifles To Amir"
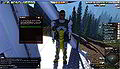
As soon as you approach Amir a dialogue pops up, click through the dialogue
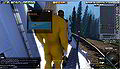
Drog'n'drop the 3 rifles from the inventory into the Quest Item window, confirm with the Accept button
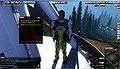
The mission gets completed (reward:
Laser Weaponry Technology), and the dialogue continues with the next mission "Shooting Star"


Shooting Star[edit]
Mission page: Mission:Shooting Star
The dialogue starts as soon as completing the preceding mission "Rifles, Assemble!", click through the dialogue
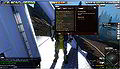
First objective: "Talk To Rusty"
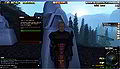
Rusty can be found at Position ~(67607, 69952, 734) at Scott's Ridge, as soon as you approach him a dialogue starts, click through the dialogue
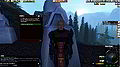
Click through the dialogue
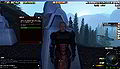
Click through the dialogue

Click through the dialogue

Click through the dialogue
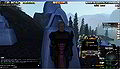
You receive a Slidek P30 (L) grenade launcher, 2k Explosive Projectiles (ammunition) and a nw objective: "Search for traces of the missing shuttle craft"
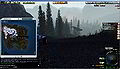
Location of the shuttle craft on the map
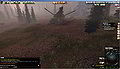
The shuttle craft is located at Postion ~(67501, 70346, 678), the "Starfinder Crash Site"
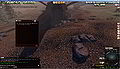
As soon as you approach the shuttle craft the misson gets completed (reward:
Support Weapon Systems skill) and the dialogue for the next mission "Inspect-A-Gadget" starts


Inspect-A-Gadget[edit]
Mission page: Mission:Inspect-A-Gadget
The dialogue starts as soon as completing the preceding mission "Shooting Star", click through the dialogue

The objective is to "Investigate the wreckage" or more precisely to operate the Flight Data Recoder at the wreckage
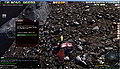
As soon as you operate the recorder the mission gets completed (reward:
 Courage) and the dialogue for the next mission "That others may live" starts


That Others May Live[edit]
Mission page: Mission:That Others May Live
The dialogue starts as soon as completing the preceding mission "Inspect-A-Gadget", click through the dialogue

Click through the dialogue
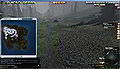
Next objective: "Find The Surviving Crew Member", about 700m to the northwest
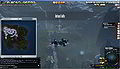
The crew member is located in an area called Jotun Falls
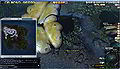
The approximate Position of the crew member is (66962, 70893, 723), as soon as you approach there's a new objective: "Investigate The Device"
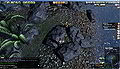
The device is a "Communicator" next to the crew member, as soon as you operate it the mission gets completed (reward
Anatomy skill) and the dialogue for the next mission "The Grande Finale" starts


The Grand Finale[edit]
Mission page: Mission:The Grand Finale


Hangar Hangout[edit]
Mission page: Mission:Hangar Hangout

.jpg)


A New Beginning[edit]
Mission page: Mission:A New Beginning
Please note: By finishing this mission you will leave Calypso Gateway and you are not supposed to come back. Please make sure you don't leave items in your Calypso Gateway storage and you have your vehicle in your inventory. Also you might want to explore Calypso Gateway a little bit more before leaving. As a player of Monria you leave Calypso Gateway to Monria Hub, only Calypso and ROCKtropia players leave to Camp Icarus.
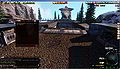
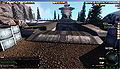

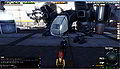
Recommended to further explore Calypso Gateway and try a few things
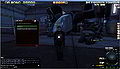
Doesn't take you to directly to Port Atlantis (PA) but to Camp Icarus (CI) south-east of PA.

.jpg)


What to do after Calypso Gateway[edit]
Planet Calypso players[edit]
For Calypso players the next stop after Calypso Gateway is Camp Icarus. There are a few new missions available at and around Camp Icarus, as well as some other interesting activities and locations. Also Camp Icarus is quite populated with other beginners and veteran players as well. You might want to proceed doing the missions and explore the environment.
ROCKtropia players[edit]
Just as for Calypso players for ROCKtropia players the next stop after Calypso Gateway is Camp Icarus as well. You might want to enjoy what Camp Icarus has to offer (see above) or visit the Sky lounge in Port Atlantis and taking advantage of the free trip to ROCKtropia.
Monria players[edit]
For Monria players the next stop after Calypso Gateway is Monria Hub. There are a few new missions available at Monria, as well as interesting locations to explore.
Calypso Gateway maps and locations[edit]

Genesis Alpha Station[edit]
...
Lake Phrys[edit]
...
Camp Amundsen[edit]
...
The supply pod[edit]
...
The Twins[edit]
...
Scott's Ridge[edit]
...
Starfinder Crash Site[edit]
...
Jotun Falls[edit]
...
Robot Structure[edit]
...
Spaceport Helios[edit]
...
Media[edit]
Images[edit]
Video[edit]
Funny but not recommended to do:
Original press release[edit]
Gothenburg, Sweden - Planet Calypso AB, developer and publisher of Planet Calypso, sci-fi MMO based in the Entropia Universe, announced today that new players now have easier access to the game. Calypso's improved Gateway gives beginning colonists a dedicated location in which to start out, get missions and learn about the gameplay and economics of the game in a safe environment.
Planet Calypso is known for its real-cash economy, sci-fi backstory, lush visuals and a very steep learning curve. Enter Calypso Gateway, the innovative starting point for newcomers. With this new update, the area now features a simpler linear layout. It also contains significantly more information about the gameplay of Planet Calypso and Entropia Universe. The "New Colonist Experience" even includes free items and skills to get new players going with weapons, ammo, armor and even a vehicle.
The Calypso Gateway is on its own island allowing players a safe place to get to know the planet and Entropia Universe. It is the first point-of-contact with the game, after the avatar creation process. Calypso Gateway features unique introductory missions to orient new players and make sure they have vital equipment. Newcomers will be able to engage in hunting, mining and crafting, using the equipment given. The tutorial-like mission structure allows players to learn about Calypso, the Real Cash Economy model and the way the basic features work.
Planet Calypso is the oldest of the planets in the Entropia Universe, with over one million registered accounts and over $400 million USD per year in user-to-user transactions. As part of the largest real economy game in the world players have the ability to participate in a science-fiction MMO where they have no monthly costs. Instead players have the ability to deposit real funds for their adventures on Calypso, or withdraw funds at any time for use in the real world. Planet Calypso is a free download available at the game's official website at http://www.planetcalypso.com.
About Planet Calypso AB Planet Calypso AB develops and markets Planet Calypso, a Massively Multiplayer Online Role Playing Game (MMORPG) based on the Entropia Platform, and is part of the Entropia Universe. Set in a distant future, the planet Calypso is home to an expanding human colony engaged with the natural and economic elements of establishing their new civilization.
For more information on Planet Calypso AB (PCAB) and Planet Calypso please contact us at the numbers below or go to our website at http://www.planetcalypso.com.
Links, references, contributors, categories[edit]
- Calypso Gateway (Forum section on entropiaplanets.com)
- Calypso Gateway (Old) - first version of the area before it was completely redesigned in VU ???
- http://www.entropiaplanets.com/threads/planet-calypso-rejuvenates-gateway-for-new-players.8024/
- http://www.entropiaplanets.com/threads/calypso-gateway-rejuvenated-for-new-players.8006/
Contributors:
|