Carpentry for Newlanders

Official guide created by Next Island! Source: Carpentry for Newlanders
|
Don't Shelve Your Passion for Furniture
Are you tired of sub-par furniture? Brittle shelving and chairs that don’t stand up for themselves got you in a funk? Looking for a fast…and fun way of manufacturing that nightstand you’ve been fantasizing about? Become a carpenter and discover the thrills and profits of Next Island DIY!

Just kidding with you. Helen Venture here, and that was my best impression of infomercials. I’d like to thank years of being a growth on my sofa coupled with my inherited lame sense of humor, from my father of course, for that gem…and all of the ones that follow.
But really, down to business. My specialty happens to be hunting, but knowing your way around a Crafting Terminal can be all that stands between you and your last slice of bread when the papoo aren’t in mating season. I’ve made it my business to learn the ins and outs of this trade, so I’m happy to pass the information along to all you Newlanders. You can all just owe me a favor to be determined at a later date…
The Nuts and Bolts
Before you can start to reap the rewards of your chosen profession, you know I’m talking PED, you’ll need to buy a few necessary tools. Every carpenter owns a Blueprint Book to store and access patterns that they receive or buy, it sure beats having those tricky papoo snatch them out of your back pockets. The only way of getting a Blueprint Book is by buying it or receiving one as a present. Unless you’ve got a rich Islander “special friend” I recommend pulling out your wallet.
Book Shopping
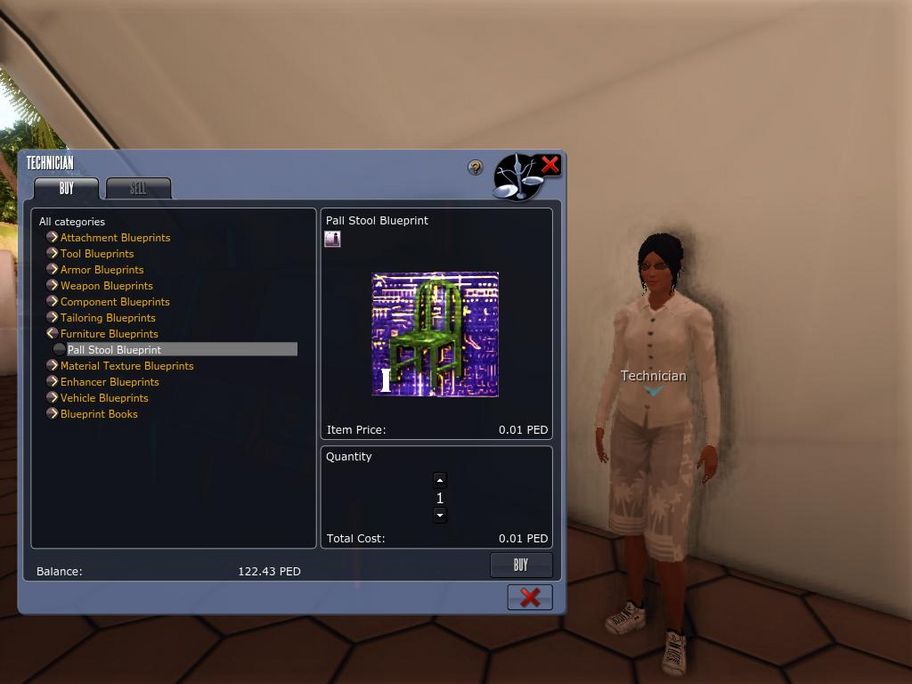
Buying a Blueprint Book is as easy as finding one of the Technicians. You’ll have to forgive me, but I really can’t tell them apart…they’re not the best conversationalists, but they do sport some pretty awesome shades. You can usually find a Technician standing underneath any of the Remnants, you know…those white structures that the First Waivers put up before they mysteriously disappeared, or in Carolines. Give the Technician a good hard Next Islander Knock, she might be napping behind those shades…I would be if I had to stand here all day, and she’ll open up her bag of wares as she gives you a charming smile and moves in for the consumerism kill.
Browse through the options on her display screen, these merchants get the best toys, until you find the Blueprint Books. You’ll want to buy a copy of Furniture (Vol. 1), heck, buy two copies if you’ve got a special friend you’d like to give one to…I should only be so lucky. Enter the number of books you’d like to buy on the display screen by toggling the arrows up and down in the box on the bottom right marked Quantity. When you’re satisfied with your order just hit the Buy button. I think the technicians’ guild must have a class on magic tricks because the minute you hit that button you’ll find your wallet a bit lighter and a sturdy book nestled lovingly in a secret inner pocket of your backpack that you thought you only knew about. Someday I’ll catch them doing it…someday!
Smells Like New Book
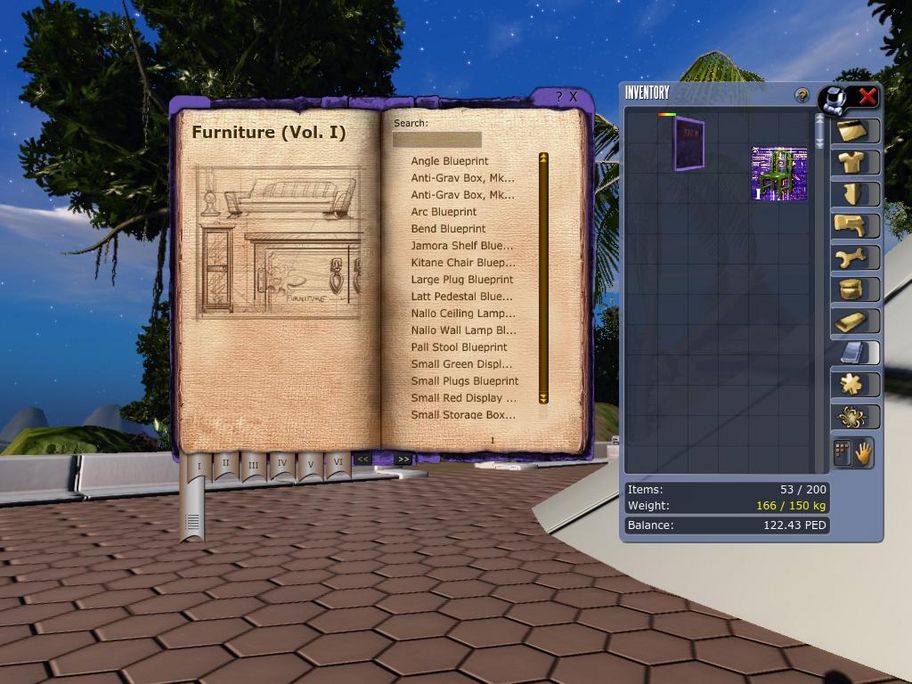
Go ahead…I know you want to take a whiff of that new book scent…I’ll just look over here until you’re done fondling your purchase. Okay, fully appreciated? Moving right along.
Your next step is going to be finding a Blueprint to add to your book. The makers of the book left the pages blank, so it’ll be up to you to collect all the necessary information. Think of the Blueprint Book as a kind of diary…for totally non-girly adults with things to do…big important things like making furniture. You can get your hands on Blueprints in exactly the same manner that you acquired your book. Go ahead and talk with the technician again, but this time around choose Furniture Blueprints and browse through the options until you see one you like. I personally think that the Pall Stool Blueprint is calling your name…I would imitate its call if I remembered your name. Select the Blueprint and then click the Buy button and marvel at the awesomeness of your shopping ability.
Divine Combination
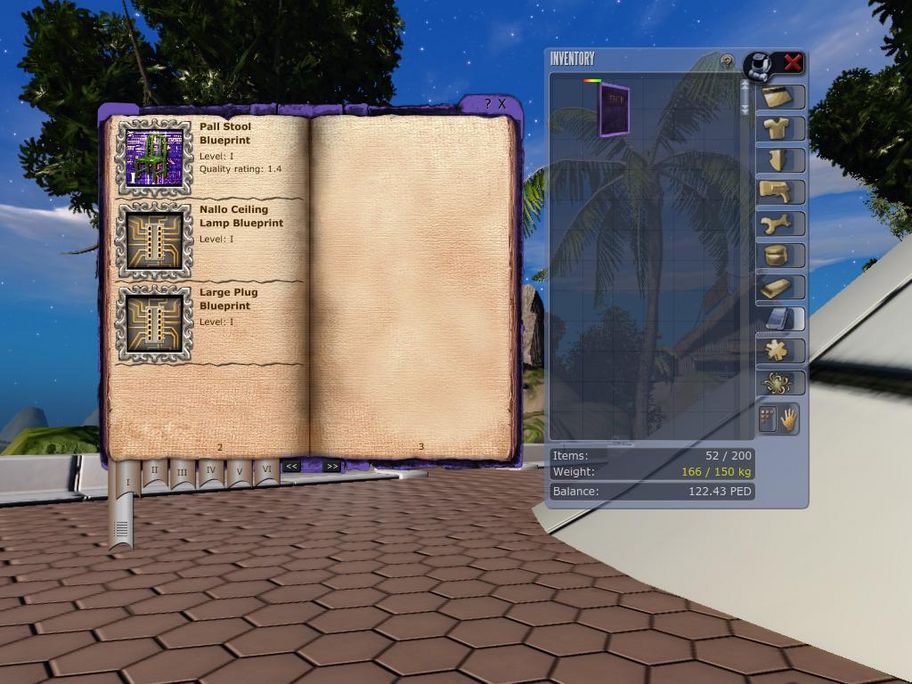
After you get a hold of your first Blueprint you’ll need to combine it with your book. It’s a little bit more complicated than you might think, but you’ll be a pro at this in no time. Open up your inventory…you know, that space at the bottom of your knapsack where all the gum wrappers and grit end up. You can open the inventory by pressing I or by clicking the Inventory button in your Desktop icons. Click the Blueprints button in the tab section of your inventory; it’s the button that looks like a book. Your Blueprint Book and the Blueprint you just purchased should be down in there, provided those sneaky papoos didn’t catch you napping.
Grab the new Blueprint and then drag and drop it onto the Blueprint Book. Voila! You’ve combined book with page and achieved a level of mastery that only true craftsmen may know…just kidding, we’ve got a ways to go yet, but I’ll get you there.
All the Ingredients
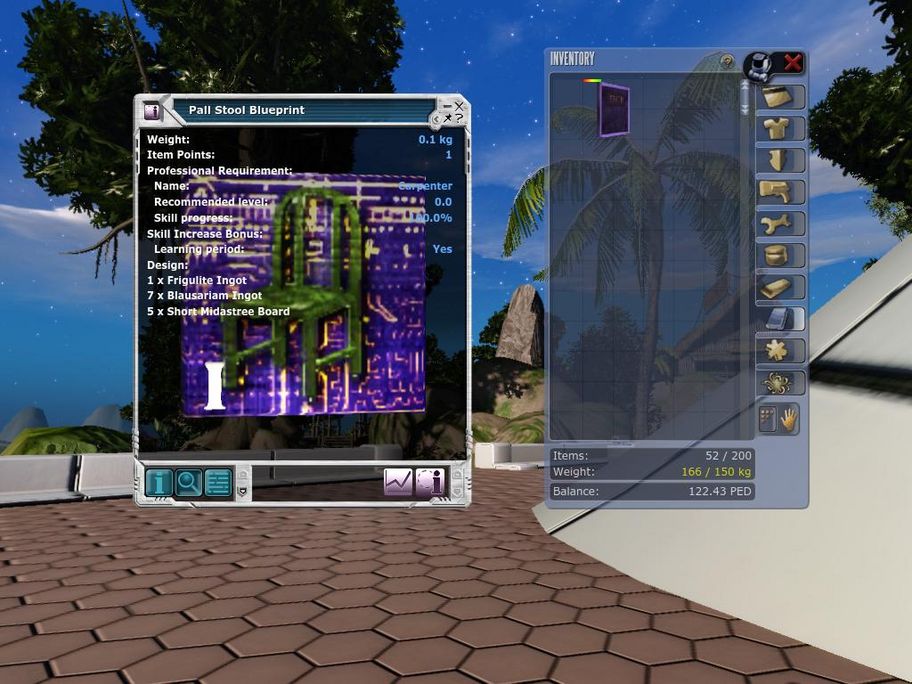
I promise there’s only a bit more buying left before we can get to the making, so just hang in there. Open up your Blueprint Book and find the Blueprint that you just inserted. You can open the book by selecting it in your inventory and then pressing the icon on the bottom right of the screen that resembles a ring box. It’s odd that we’re being proposed to at this time, but it would be rude not to accept. Look through the index of the book until you find your Blueprint, it should be the only name with a picture attached to it, and when you tap on the title the book will automatically open to the correct page.
Click again on your Blueprint, as several are stored to a page, and a window will appear giving you information about the items needed, the weight, the professional requirements, etc. This book may look and smell like it’s made of paper, but you’ve probably guessed that there’s a bit more at work here. Welcome to the future, where high tech masquerades as paper pulp. I’m still getting used to it too. For now let’s just focus on the things you’ll need to buy.
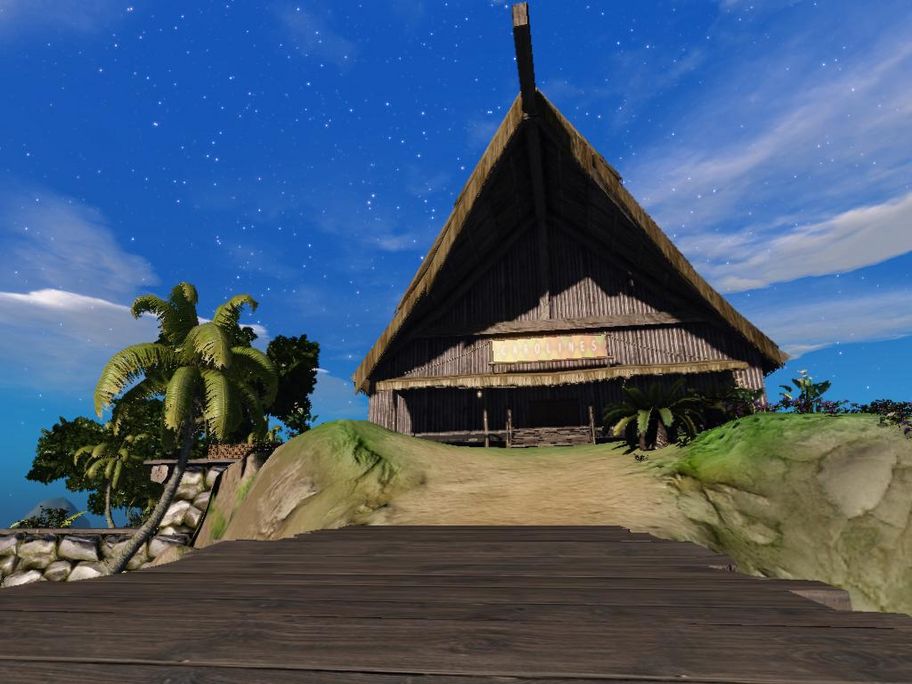
After looking at the items you need we’ll take a trip to Carolines to buy some supplies from the auctioneer. You can find auctioneers underneath any of the Remnants, but Carolines is a major hub of activity so I highly recommend familiarizing yourself with the place. Carolines is easy to locate because it’s the highest point in Crystal Resort, so if you get lost and you still see buildings then just keep walking up. The doors of Carolines are so state of the art that they don’t even open. Instead the high tech thingamajigs in the walls make you non-corporeal for a matter of seconds so that you can just ghost your way through.
Step right up and speak with the auctioneer behind the counter.
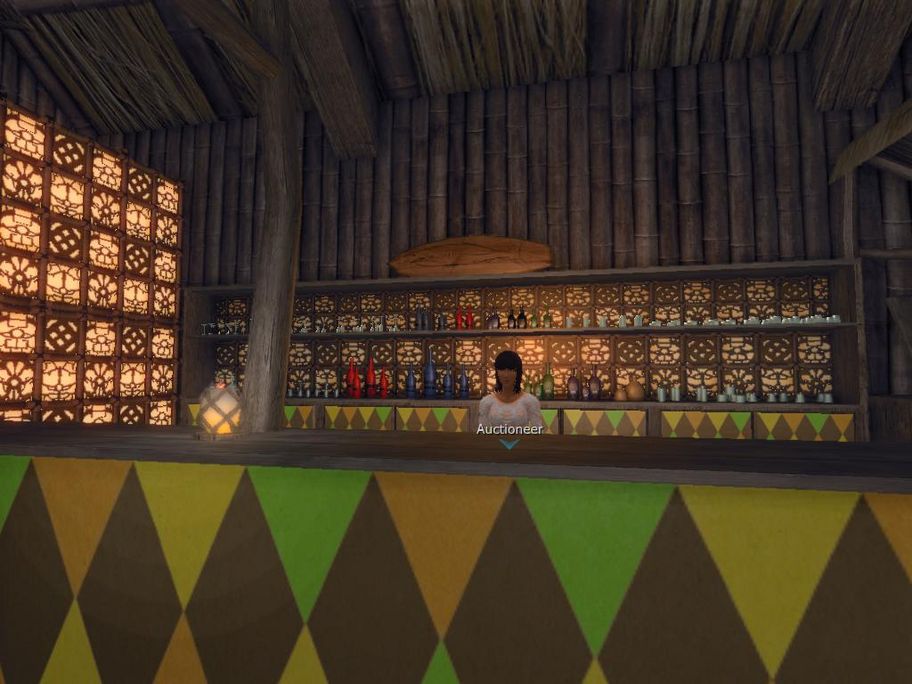
Ah, Carolines! This is one of my favorite spots to unwind after a long day of hunting. Carolines can get really busy so you’ll have to give the auctioneer a good Next Islander Knock to get her attention. She’ll go ahead and open the auction screen, which is a database of information that you’ll be getting very familiar with while living in the Next Island universe.
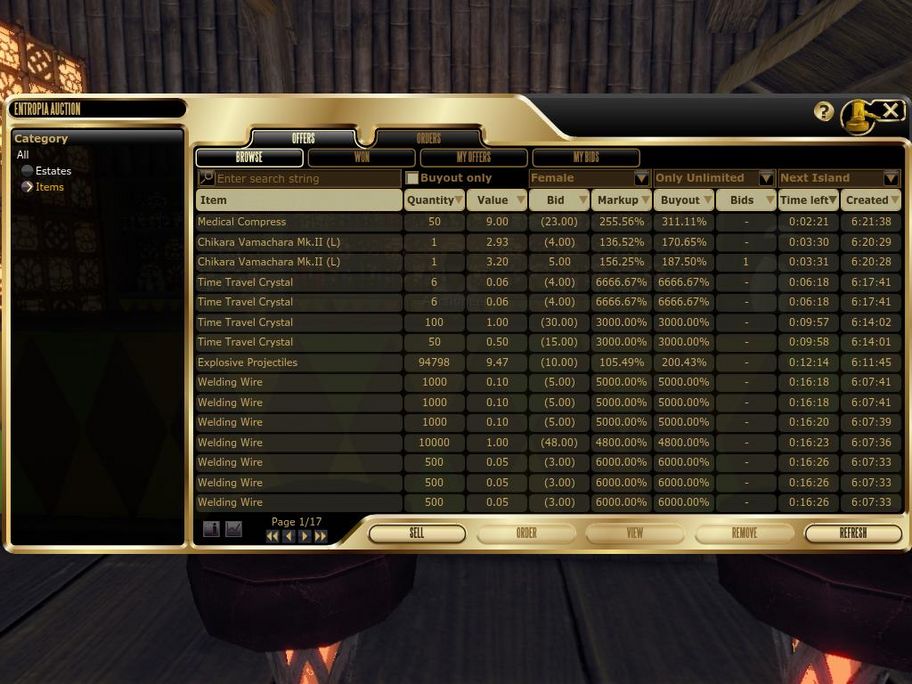
No one really knows how many items are listed in this database, so you’ll save yourself quiet a bit of time by just entering a search term into the bar at the top left of the screen that says Enter Search String. I just want to warn you right now that if your spelling is off even a bit the machine will explode…or just not give you what you wanted. It’s easiest if you open your Blueprint for reference until you get the supply names down. After you’ve typed in what you’re looking for hit enter or tap on the magnifying glass to the left of the search bar. A second window will pop up with items that match your search term.
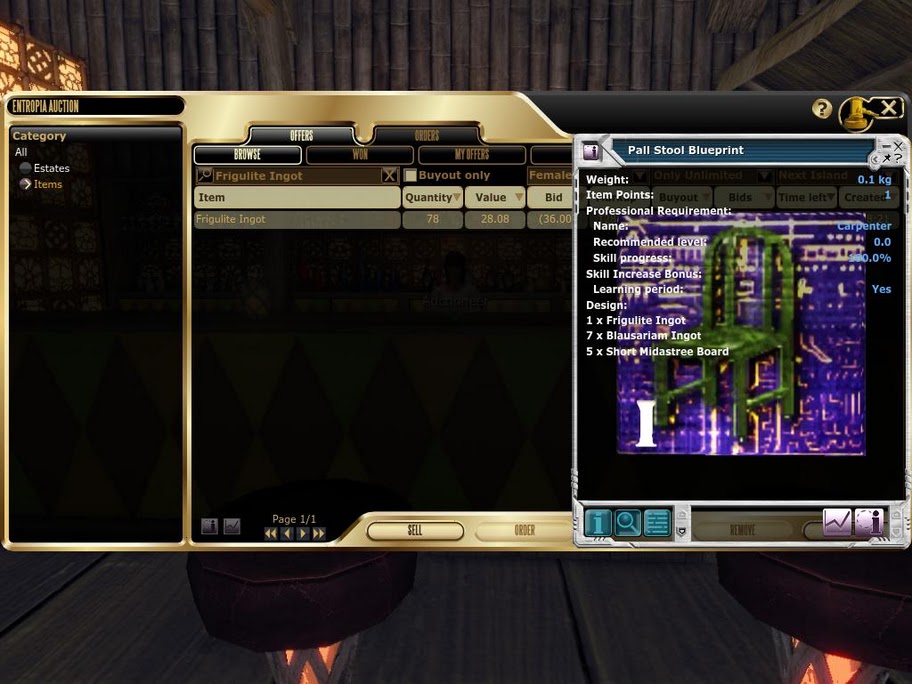
All of the stuff that appears in this screen belongs to other Islanders who are trying to make a bit of cash. You’ll notice that these items appear in different quantities, so the lot that you decide to bid on will be influenced by the amount of an item that your Blueprint calls for. When you’ve found a lot that you want to bid on click the lot to highlight it and then click the View button at the bottom of the auction screen. This will bring up a window that lets you change the price that you want to bid.
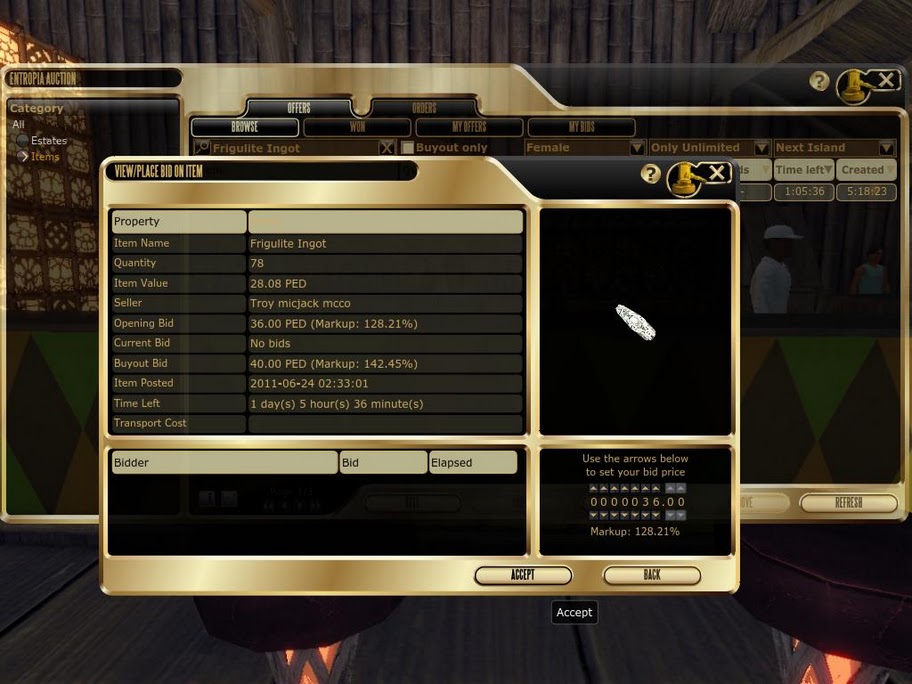
You can change your bid amount on the bottom right of the screen by toggling the arrows up and down or just hit the Accept button to agree to the bid terms. Once you’ve clicked Accept you’ll be given a confirmation screen that tells you the amount that you’ll pay. If the price suits you then just click the green check mark, but if you’d like to think it over a bit more then hit the red X.
Once you’ve entered a bid you’ll have to wait until the auction closes. You could stand in Carolines twiddling your thumbs for a few days, but I generally try to set bids right before I go hunting so that I don’t have to spend any time waiting around.
If you want to check on the status of your bid at any point you can do so by either scanning through the list of items until you find one with a coin icon attached to it, indicating that you’ve bid on this item, or by clicking the My Bids tab in the auction. If you win the lot then the auctioneer will sneak the item into your inventory and suck the PED right out of your wallet.
Keep repeating the bidding process until you’ve won all the items you need for your Blueprint. Just be careful not to bid on the same item multiple times as you’ll have to pay for anything you win. The debt collectors don’t listen to pleading…believe me I’ve tried.
Some Assembly Required
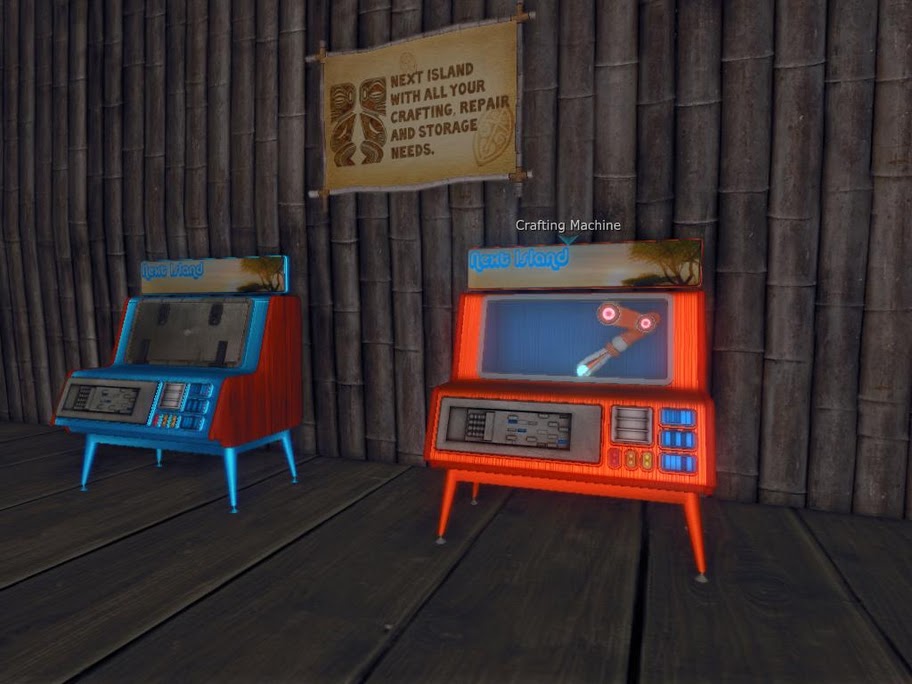
Give yourself a pat on the back…and maybe a glass of water…shopping can make even the bravest of carpenters a little bit sleepy. Your next move is to find a Crafting Machine; luckily you won’t have to go very far. Crafting Machines are scattered all throughout Next Island and there happen to be two in Carolines.
Give the Crafting Machine a good hard whack to get it up and running. They’re grumpy machines by nature, but perhaps the two of you can grow to love each other through time and commitment.
The crafting screen will pop up and tell you that you don’t have a Blueprint selected, but don’t fret because this is easily fixed. Open your Inventory, if you’ve forgotten how I’ll just gently remind you to look back to the start of the guide. Once you’ve opened the Inventory you’ll want to hit the Blueprints tab and then click on the Blueprints Book to bring up the item description screen. Click on the button that resembles a ring box to open the book. Click on the name of your Blueprint in the menu and then again when it opens up to the page that it’s displayed on. When you’ve finished this chain of actions your Blueprint should show up as selected on the crafting screen.
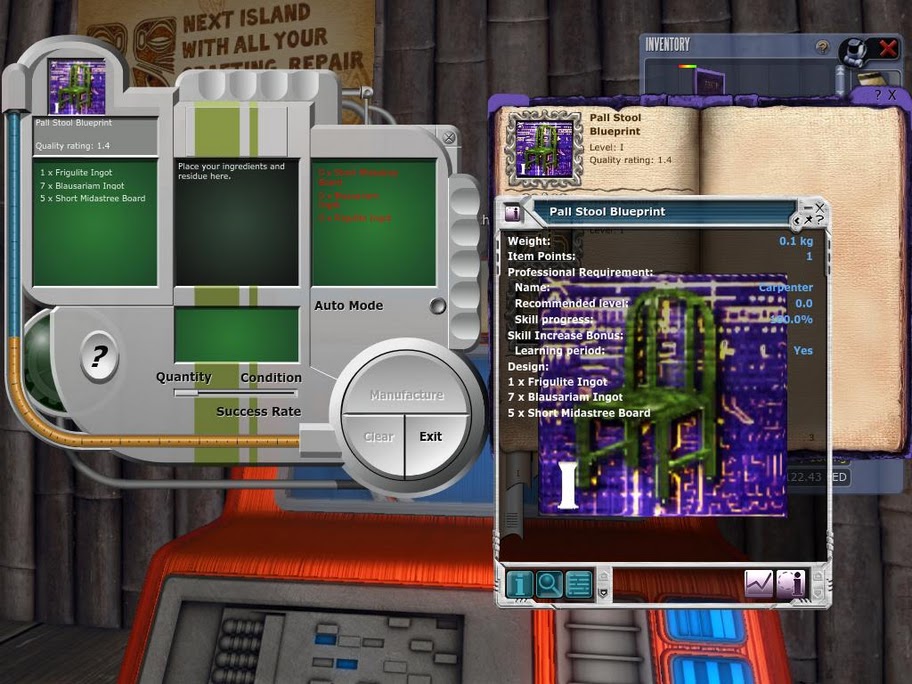
You’ll need to give the Crafting Machine some of your hard earned materials…seriously, stop clutching at them like a baby blanket. Go to the tab in your Inventory that the materials are located in, this will either be the Mined Resources or the Materials tab. It’s pretty likely that you’ll have bought more of the material than the amount you needed for this project, as most of the auction lots are bundled, so you’re gonna have to split your materials. Right click on the item that you want, this will bring up a sub-menu, then just click the Split option. You’ll see a small window open that lets you enter in an amount by pressing up or down on the arrows. Put in the amount of material that you need for your Blueprint and then hit the green check mark. Your stack will be split into the pile that you asked for and a pile of the leftovers…mmmm leftovers…
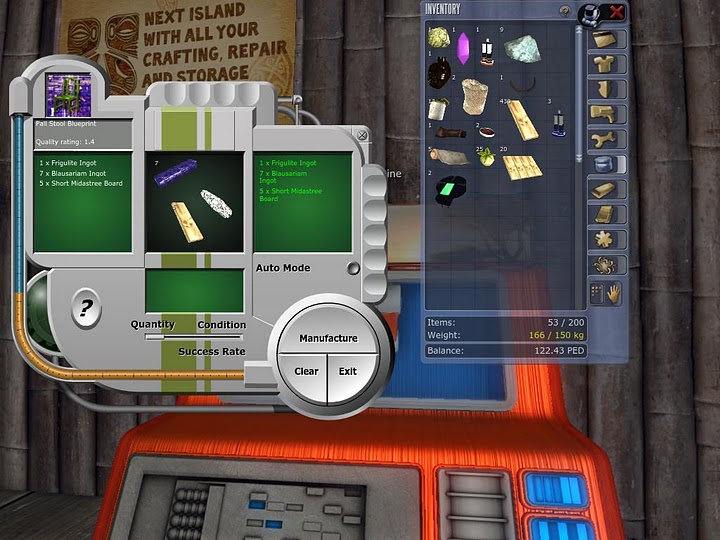
Click on the pile that you wanted and drag it onto the center of the Crafting Machine window, that’s the green square that’s darker than the others. Once you’ve dragged and dropped the item onto the window you should see the item name in the square to the right of the window, it acts as a list of the items you need for the blueprint, change from red to green. Drag and drop all of the items you needed for your Blueprint onto the window, splitting as need be.
When you’ve fed the Crafting Machine all the necessary materials the Manufacturing button will become operational. As I warned you, the Crafting Machine can be kinda moody so it’s possible that you’ll plug all the items in and then have the process fail at least once. If you want a higher chance of success you can mess with the Quantity/Condition bar, but there are trade-offs. A higher success rate will give you a diminished quality item, this means that the item will decay more quickly with each use and thus require repair more often than a high quality item. Drag the Quality/Condition bar to a setting you like and then hit the Manufacture button.
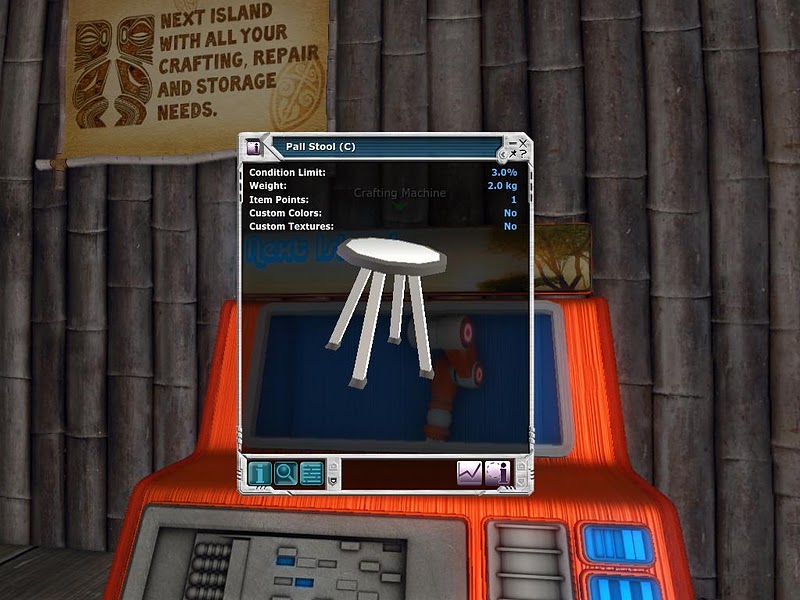
If the machine does its job properly you’ll end up with this gorgeous Pall Stool. However, if a rats managed to get into the gears then you’ll get a screen either telling you that the process failed or that the process has failed, but you’ve salvaged some of your materials.
Reaping the Rewards
There are plenty of satisfying moments in the life of a craftsmen…carving the finishing touch, watching paint dry, seeing a small child laughing gleefully while they…sit on the stool….Personally I really just enjoy the money bit, but it’s up to you to decide. You can hold on to the chair as proof of your craftsmanship, offer it in trade, or put it up for auction. Let’s just assume that you really love PED.
Open the information window for your Pall Stool, you can do so by opening the Inventory, choosing the Miscellaneous tab and then clicking on the item, and look at both the TT Value and the Max Value. The TT Value is a representation of the value of your item based on the level of skill you were able to put into crafting it. Given that you’re just a beginner carpenter your TT Value will be somewhat low. The Max Value represents the maximum amount of value your item can have if you’ve reached master carpenter status. Yes, my Max Value is larger than yours…no need to be envious though…we can always buy you a big car to make up for it. Just joking with you!
These two values will help you decide the amount of PED you’d like to set for your item at auction. You might also want to check the Market Value to see how much the item has actually been selling for as auction prices can change day to day. If you want to take a look at the Market Value then just open your item screen and click the Miscellaneous tab. Go ahead and right click your item and pick the Market Value option.
After you’ve had a look at all of these values you should have a bit of understanding about a likely price to set for your item…if not there’s the tried and true method of whispering a random number in the auctioneer’s ear while you give a knowing smile that says “Yeah, I know what I’m doing.”
Tap the auctioneer on the shoulder to get her attention. You’ll want to leave the Miscellaneous window open while you talk to her so that you can pull your product out when she asks to “sample the merchandise.” Once she’s pulled up the auction screen for you then just choose the Sell option at the bottom of the window to pull up the screen shown below:
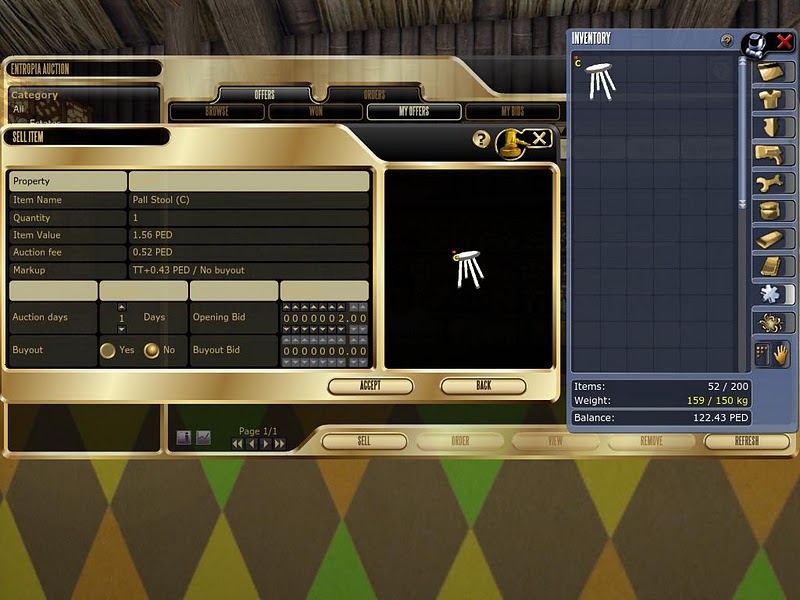
Click on the Pall Stool and drag it onto the Sell screen as I’ve beautifully demonstrated above. Then go ahead and set the number of days that you want the auction to run and the opening bid you’d like to set.
In terms of auction days, the more days you set the more time your item will have to gain bids. The downside is having to wait for your money….sigh, waiting…Set the auction days in the Sell screen by pressing the arrows up and down in the Days slot.
You can change the Opening Bid by toggling the arrows up and down in that slot. As I said before, your Opening Bid should be influenced by the TT Value of your item as well as the Current Market Value.
The Buyout Bid option lets you set a price that if reached will automatically give the item to that bidder. This is a good method if you either don’t feel like waiting long or if you’re only looking to make a set amount of PED. First choose Yes or No on this option. If you pick Yes then you can set the Buyout Bid price by toggling up and down on those arrows.
That about wraps it up. Feel free to offer me a handful of PED in appreciation of my excellent teachings…or a smile works…I guess. This has been Helen Venture with Carpentry for Newlanders. Keep an eye out for my future guides and I’ll be like the big sister you never knew you had or wanted. Good luck and may the papoo never get the drop on you!
More Official Next Island Guides: